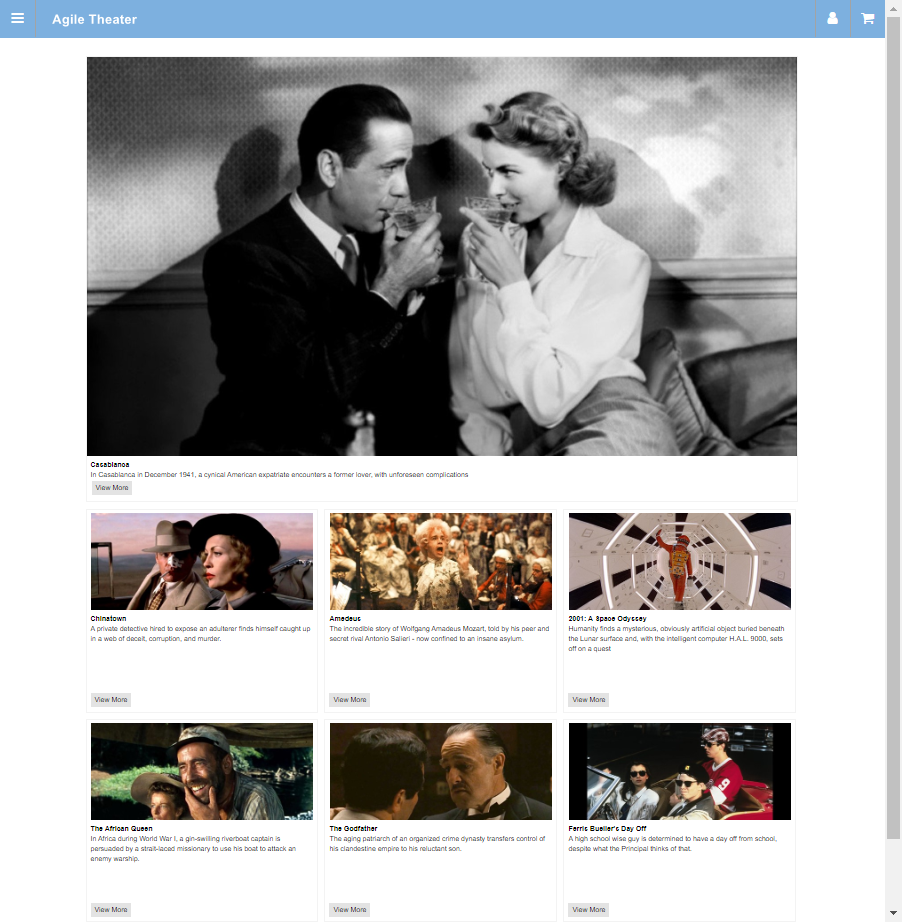
In Agile Admin, it is possible to curate a special list of events in Web Sales. This feature could be used to spotlight a certain category of events, such as panels, a list of highlighted films, etc. This will create a web page that will display the highlighted events.
The layout of this page will make the first event much larger than the others. However, the list itself is randomized. Every time a customer visits this page, the list will be in a different order. Thus, each event has a chance to take the spotlight at the top of the page.
To create a specific list of events in Web Sales, proceed with the following steps:
Part 1: Create a Custom Property.
Create a custom property for the category of events you would like to highlight. Creating Custom Properties contains specific instructions for doing so. When you reach Step 5 of that article, pay special attention to the following features:
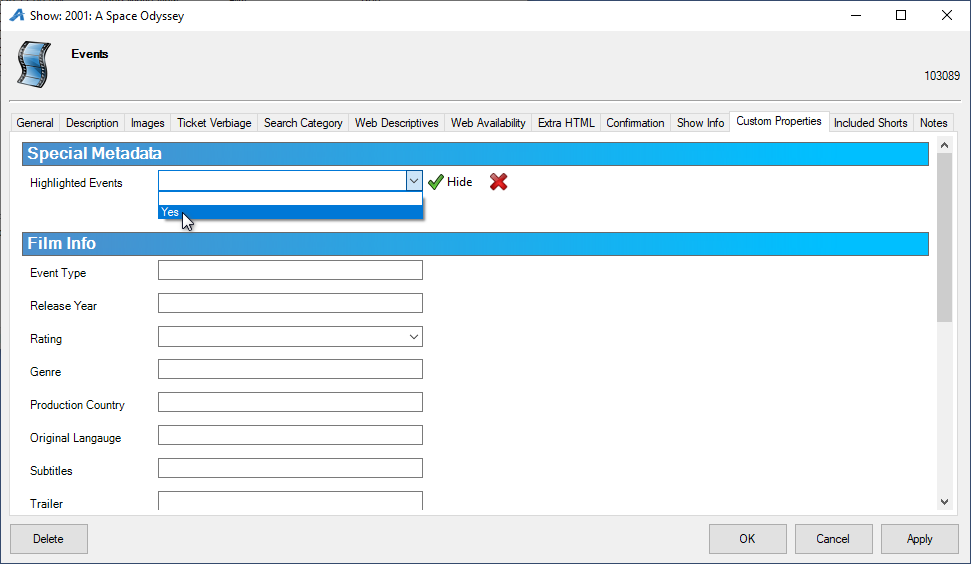
- Name: Give your Custom Property a distinctive, easily identifiable name such as “Highlighted Event.”
- Group: Give your Custom Property a distinctive Group such as “Special Metadata.”
- Suggested Value: Add “Yes” to the Custom Property’s Suggested Values. The highlighted list will not function properly if this Suggested Value is not added.
Your Custom Property should resemble the one in the image below: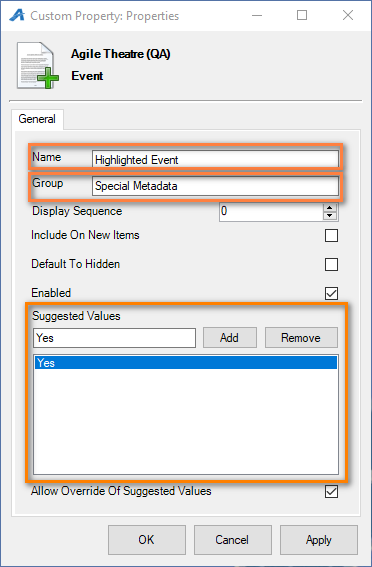
Part 2: Set the Custom Property’s Value to “Yes” for Every Event to be Highlighted.
- Once you have created your custom property, select the blue Sales Organization folder where the set of highlighted films are located.

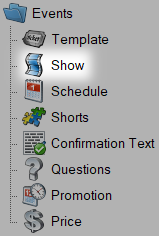
- Select Show.
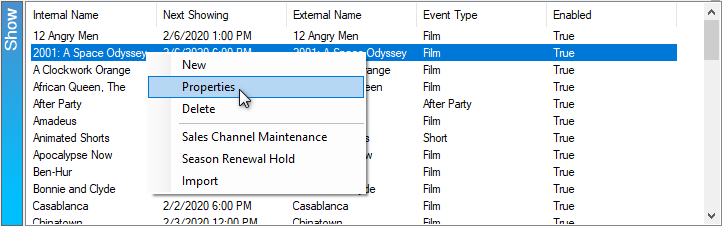
- In the Show box, select one of the events you wish to highlight. Right-click the event and select Properties.
- Select the Custom Properties tab. You should see the Group of your custom property as a blue header. Underneath it, you should see the Name of your Custom Property and a drop-down list to the right. Select Yes in the drop-down menu. Select OK to save your changes.
- Repeat Steps 3 and 4 for every event you wish to highlight.
Part 3: Create an Entry Point and a Filter for the List of Events.
- Select the Web folder.

- Select Entry Points.
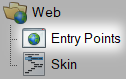
- Select or create an Entry Point Group relevant to the web page you will create. (If you do not have an Entry Point Group, see How to Create Entry Point Groups.)
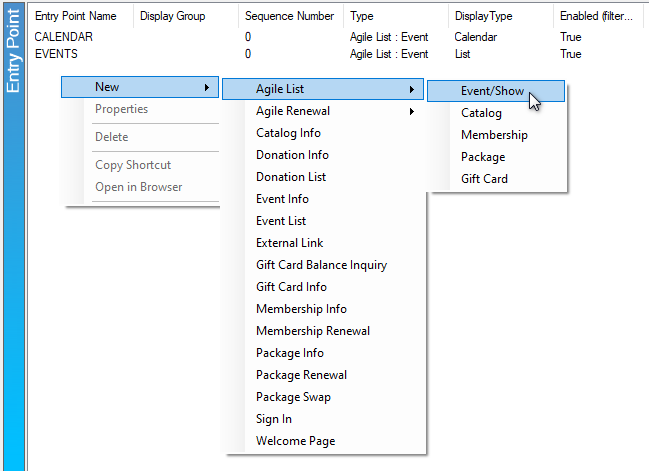
- In the Entry Point box, right-click and hover your mouse over New so that a drop-down list appears. Then, hover your mouse over Agile List so that a second drop-down list appears. Select Event/Show.
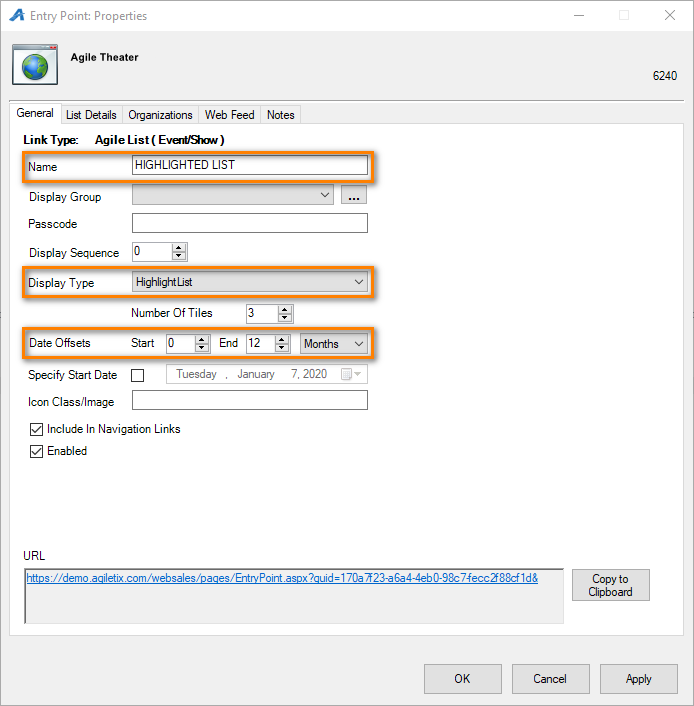
- The Entry Point: New window will appear. Under the General Tab, be sure to set the following features:
- Name: Give the Entry Point a name that will be easily understood by you and your customers, such as “Highlights.”
- Display Type: In the drop-down list next to Display Type, select HighlightList.
- Date Offsets: Adjust the Start and End numbers and time period of events the system should display to a customer. For instance, in the example Start and End have been set to 0 and 12 months, respectively. This means that a customer visiting the page on a current date will view events from that date until 12 months in the future.
- Select the List Details tab. In the drop-down list to the right of Available Filters, select the name of your Custom Property. Then, select the Plus icon to add the filter.
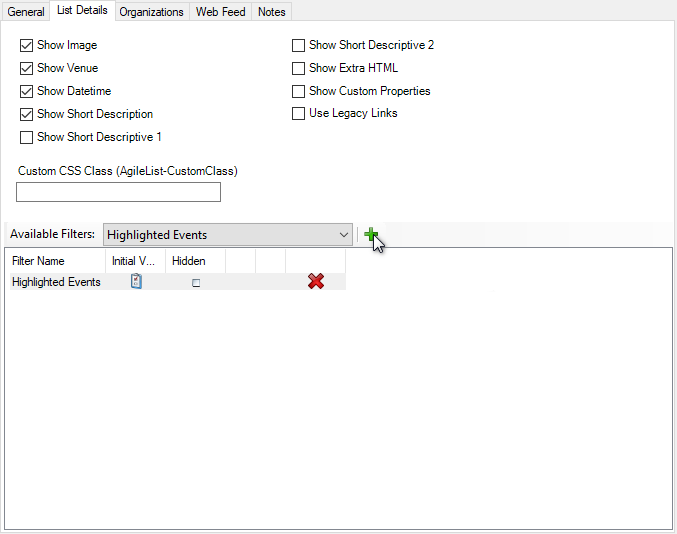
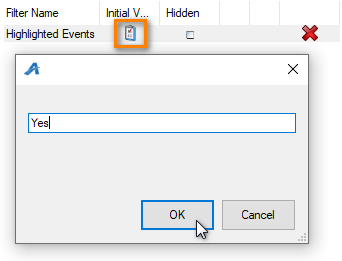
- Under the Initial Value Column, click the Clipboard icon. A new window will open. In the text box, type “Yes.” Then, select OK.
- Under the Hidden column, check the box so that it shows a green checkmark.

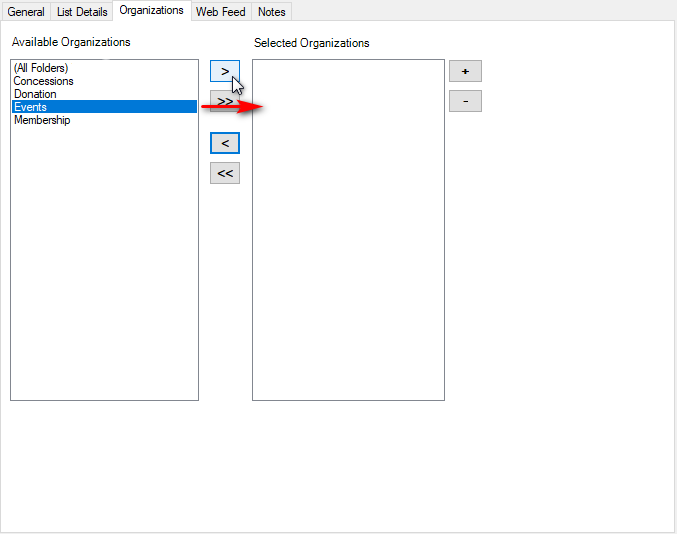
- Select the Organizations tab. Move the Sales Organization folder(s) which houses the highlighted events from the Available Organizations column to the Selected Organizations column.
- Select OK at the bottom of the window to save your changes.
You have now created a special list of events for your customers to peruse in Web Sales.
Comments