1. Log into Administration.
2. Select the House Icon  .
.
3. Open the Web folder.
4. Select the Entry Points icon.

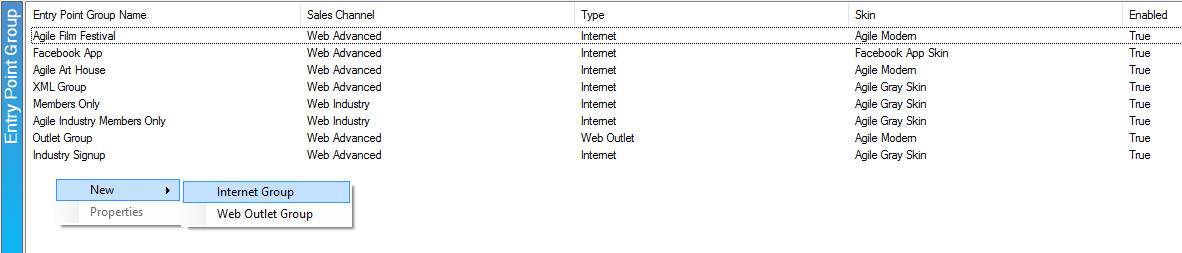
5. Right-click in the Entry Point Group area and select New > Internet Group.
6. Fill out the following areas on the General tab (not all will be applicable to your needs):
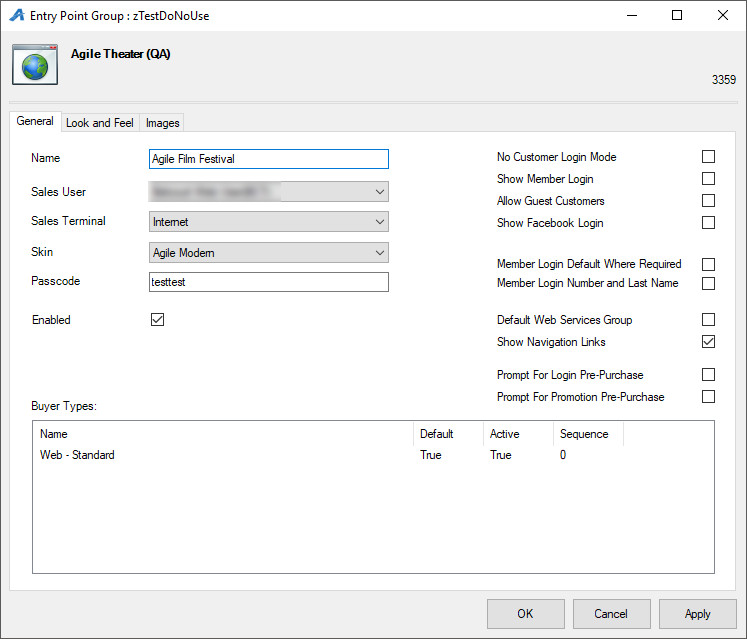
- Name is for internal use only. If a new entry point group is created yearly, then we highly recommend adding the date into the name.
- Sales User specifies which user should have access to this entry point group. Select the Web User option from the list. If you do not see this option, ask your Agile Support Representative for assistance.
- Sales Terminal specifies which terminal is used for sales. Select Internet from the list. This information is tracked in reporting. If you do not see this option, ask your Agile Support Representative for assistance.
- Select the Skin that should be used for the entry point group. The Skin will determine how the URLs will look online. If you are interested in having Agile match the look and feel of your current website, contact your Agile Support Representative for a quote.
- Add a Passcode only if you need the web pages in this group to be available only to customers who enter the passcode. Leave blank if the pages should be accessed by the general public.
7. At least one Buyer Type must be created on the Entry Point Group. This determines which prices are available online. Typically, this is Web Standard. To add this, right-click in the Buyer Type area and select New. Choose the Buyer Type from the drop-down (it will most likely be Web Standard), then click OK. The Buyer Type will be added to the list.

8. Check the following boxes on the right-hand side if they are applicable to your organization:
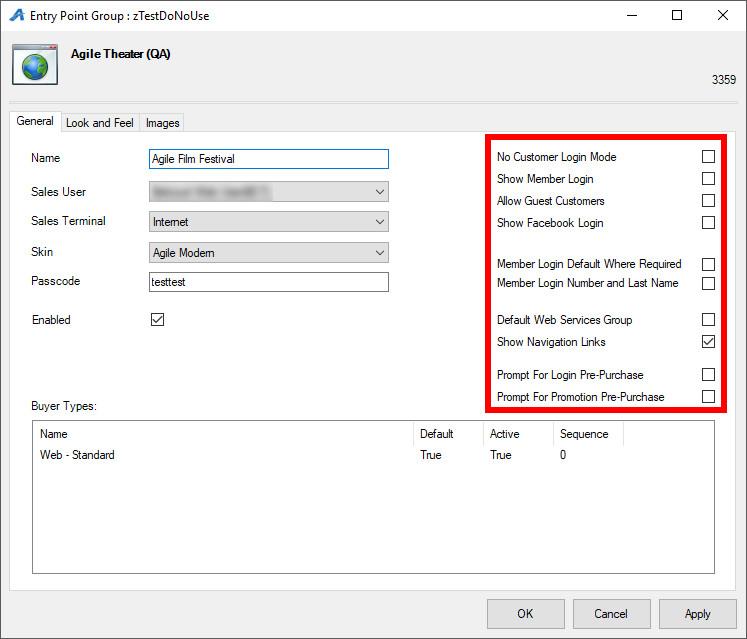
- No Customer Login Mode does not allow customers to log into their customer account. This is not recommended for any client that uses benefits.
- Show Member Login displays the member login button.
- Allow Guest Customers does not force customers to sign in or sign up for a customer account when making a purchase. (Note: it will still require customers to enter address information, but a customer account will not be created.)
- Show Facebook Login adds a Facebook box to the bottom of each Entry Point, where Facebook users can log in and comment on the event.
- Member Login Default Where Required forces members to login to their membership using their member number and password.
- Member Login Number and Last Name forces members to login to their membership using their member number and last name.
- Default Web Services should be checked if this is the main Entry Point Group used for your organization. Only one group can have this box checked.
- Show Navigation Links hides all navigation links in the navigation bar if unchecked. We recommend keeping this checked at all times unless you are making major changes to your web links.
- Prompt for Login Pre-Purchase: asks the customers before they see any ticket options whether they have benefits that may apply. The text involved can be changed in the properties of each Buyer Type created in the entry point group.
- Prompt for Promotion Pre-Purchase asks the customer if they have a promotion code before they can see any tickets that have promotions available.
Comments