After you have unpacked your new Customer Pole Display, you may follow the below instructions to install and begin using the Display. Find your operating system, and follow the below instructions. If you have issues getting the Display to work as expected, contact your Agile Ticketing Solutions Support Agent for assistance.
Windows 10
1. Plug the Display into a USB Port. The system will automatically interface and install the necessary drivers.
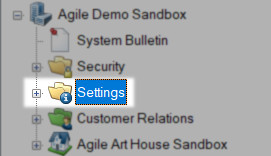
2. In Agile log into Administration.
3. Open the Settings folder.
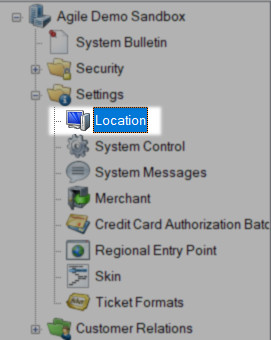
4. Click on Location.
5. Then, click on your Organization's name.

6. Below, right-click the specific terminal that you are installing this Display on, and click Properties.

7. In the new window that opens, click on the Other Devices tab.
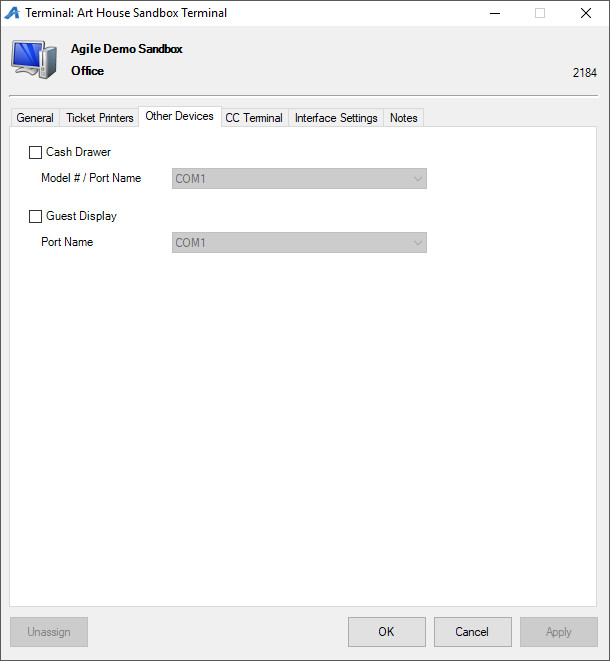
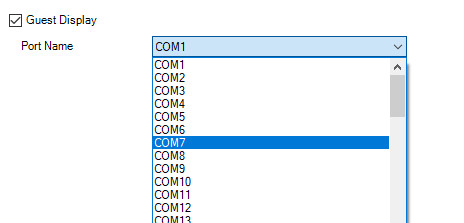
8. Enable the Customer Display, and select the COM Port that the Display is assigned to. (This can be found in the computers Device Manager).
Windows 8
- Windows 8 can require that you either follow the Windows 10 instructions or the Windows 7 instructions.
- We suggest that you first attempt the Windows 10 set of instructions.
- If that does not work, then contact your Agile Support Representative.
Windows 7
Windows 7 is no longer supported by the drivers for the Pole Displays
Comments