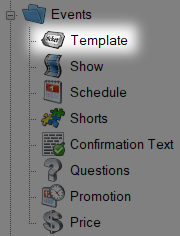
1. In Administration, open the Blue Sales Folder where you will be importing your Events and select the Template icon.
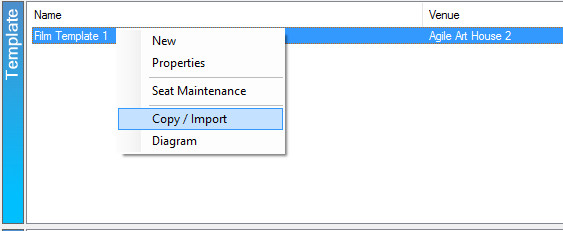
2. Select the Template where you wish to import your events.
3. Right-click the Template and select Copy/Import.
4. The Copy/Import window will appear. To import events, select Event as the Copy Type.
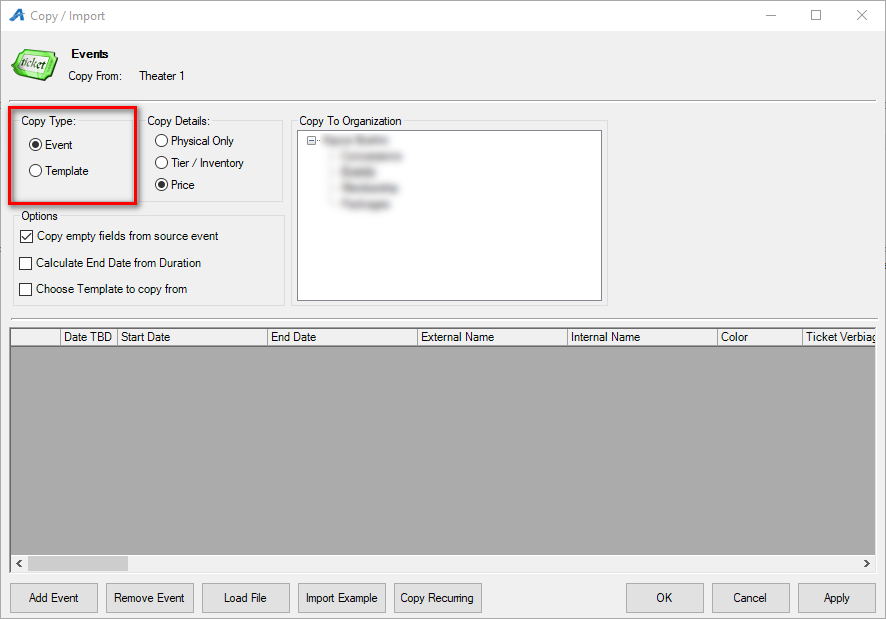
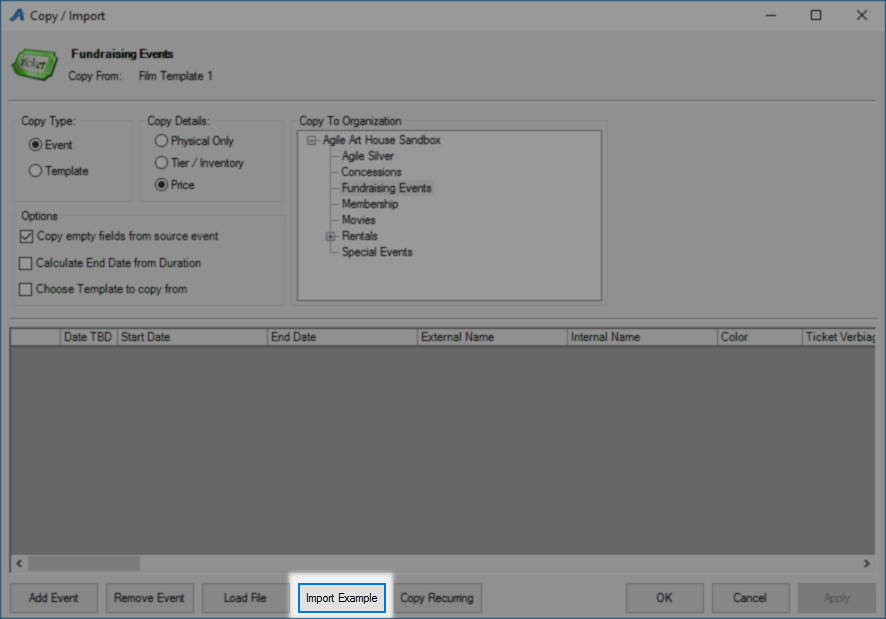
5. Select Import Example to save the Import Spreadsheet Example to your computer.
6. Enter the following information into your spreadsheet:
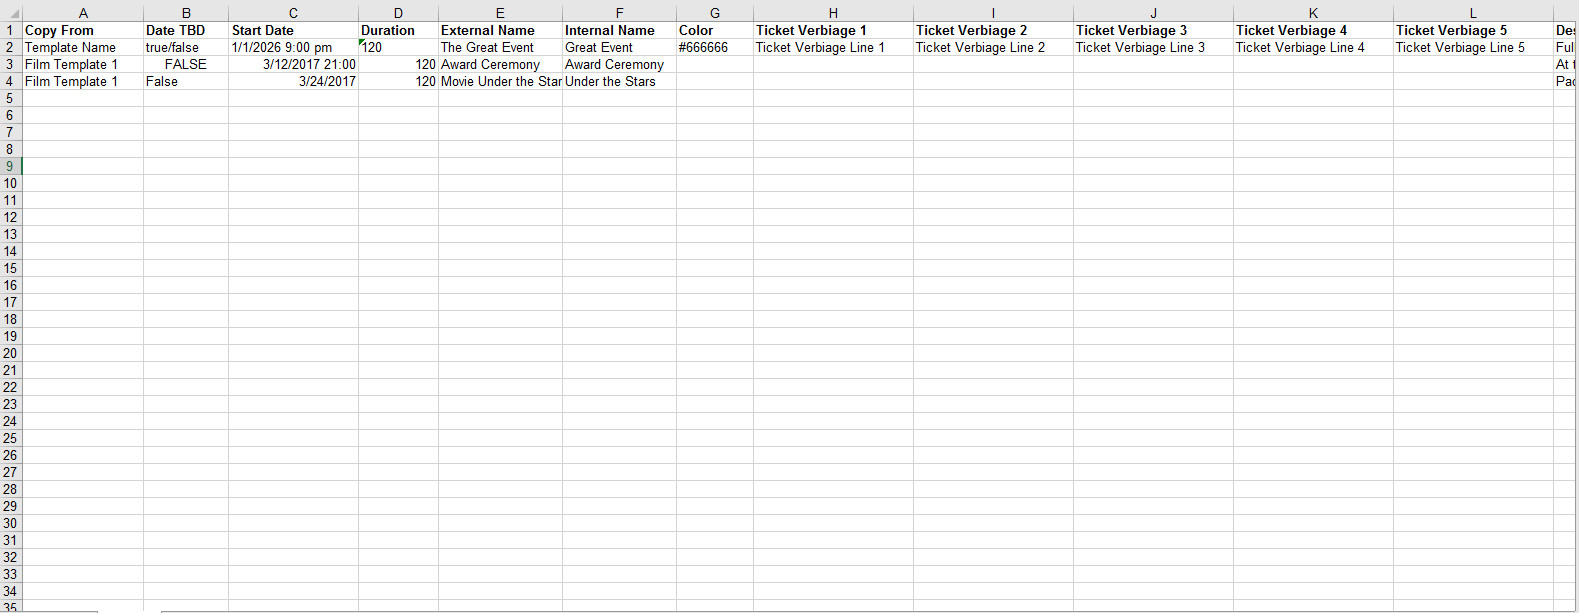
- Copy From (Column A) – Add the exact name of the Template you will be using for this import. *Required
- Date TBD (Column B) – Type FALSE if you have confirmed the dates you wish to import. If you have not confirmed the dates you wish to import, type TRUE. *Required
- Start Date (Column C) – This is the date and time of your Event. *Required
- Duration (Column D) – This is where you will enter the duration of your event in minutes. *Required
- External Name (Column E) – This is the name of the event that will appear online. *Required
- Internal Name (Column F) – This is a (usually shortened) name for your event that will only appear in Agile Admin and Sales. *Required
- Color (Column G) – **Not Required
- Ticket Verbiage 1 – 5 (Column H-L) – This is where you will put information that will appear on the ticket. **Not Required
- Description (Column M) – This is where you will enter the description for your event. **Not Required
- Short Descriptive 1 /Short Descriptive 2 (Column N&O) – These areas allow you to put short descriptions that appear either at the top of the ticket page or under the date and time of the event. **Not Required
- Short Description (Column P) – This is a short synopsis that appears in a List View on your website **Not Required.
- Confirmation (Column Q) – Add specific confirmation text for this event that will be emailed to the customer once their order has been confirmed. **Not Required.
- Image (Column R) – This can be the list of image names for your event that you can import at the same time as the spreadsheet. **Not Required
- Thumbnail (Column S) – This a smaller image that will appear in your event listing online. **Not Required
- Overhead Image (Column T) – This is a seating chart image that your customers can view online. **Not Required.
- Overhead Thumbnail – Small version of you seating chart. **Not Required
- Ticket Image/Extra Image/Media (Columns V-W) – Add an image that will appear on print-at-home tickets and include a video that appears online. **Not Required
7. Save and Close the spreadsheet once you have completed entering your Events.
8. In Administration, go back to the Blue Folder and select Template.
9. Right-click the Template you selected in Step 2 and select Copy/Import.
10. Select Load File and choose the spreadsheet from your computer.

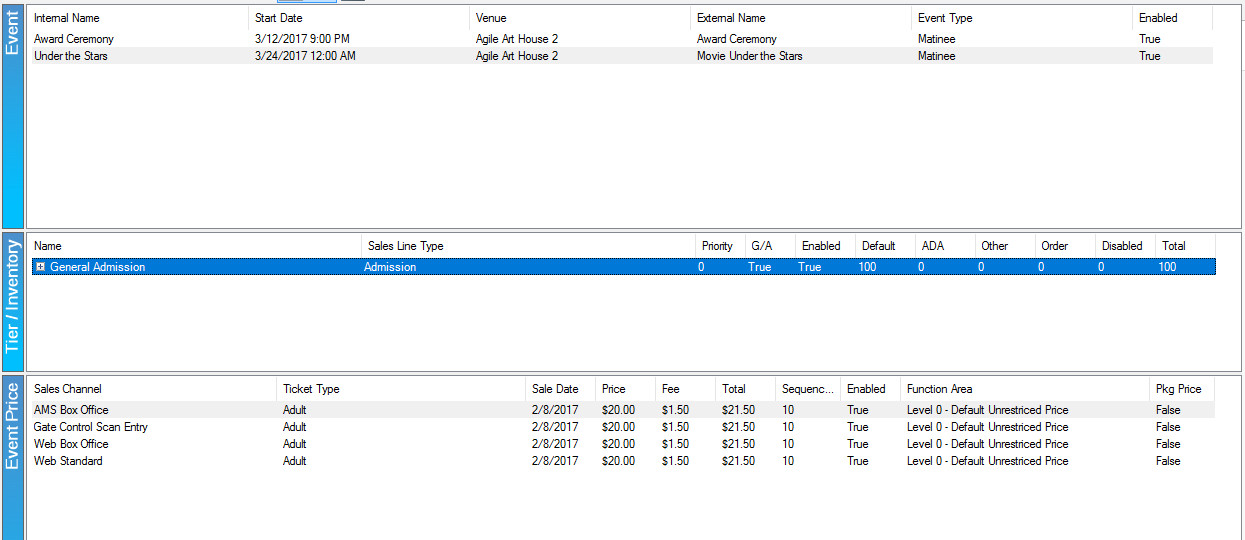
11. The Events will now be in the Copy/Import window. Make any edits if necessary.
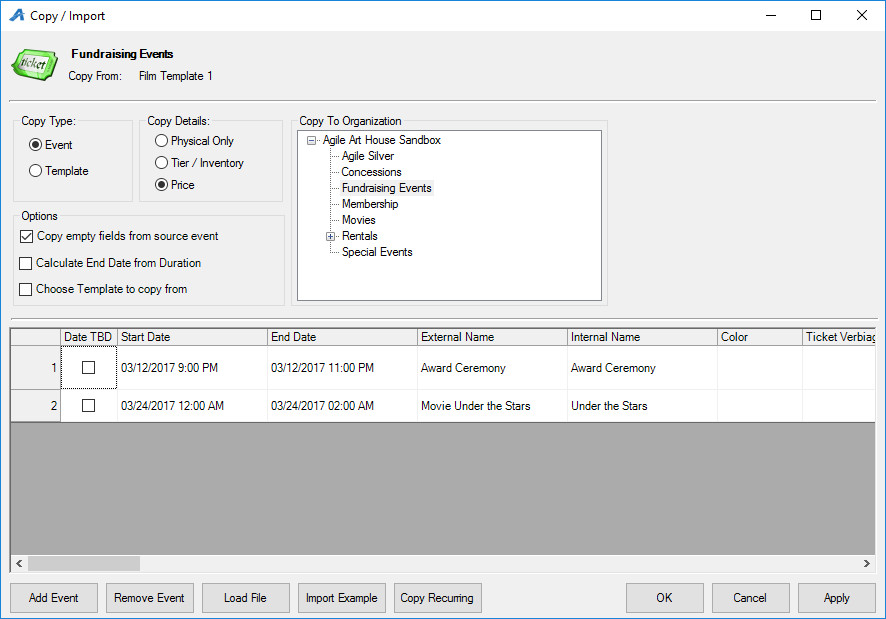
12. Once you are sure that your imports are correct, click Apply and OK. You should see Events and be ready to place them on sale.
Comments