The Lemur-C printer with Cutter should be cleaned every time a ticket bundle is replaced, (approximately 1,000 tickets). The Boca Lemur-C without a cutter only needs to be cleaned about once a year.
1. Disconnect the printer's power supply and any other cables connected.
2. Remove the printer cover by depressing the cover lock tab and slide the cover off as shows in image 1. 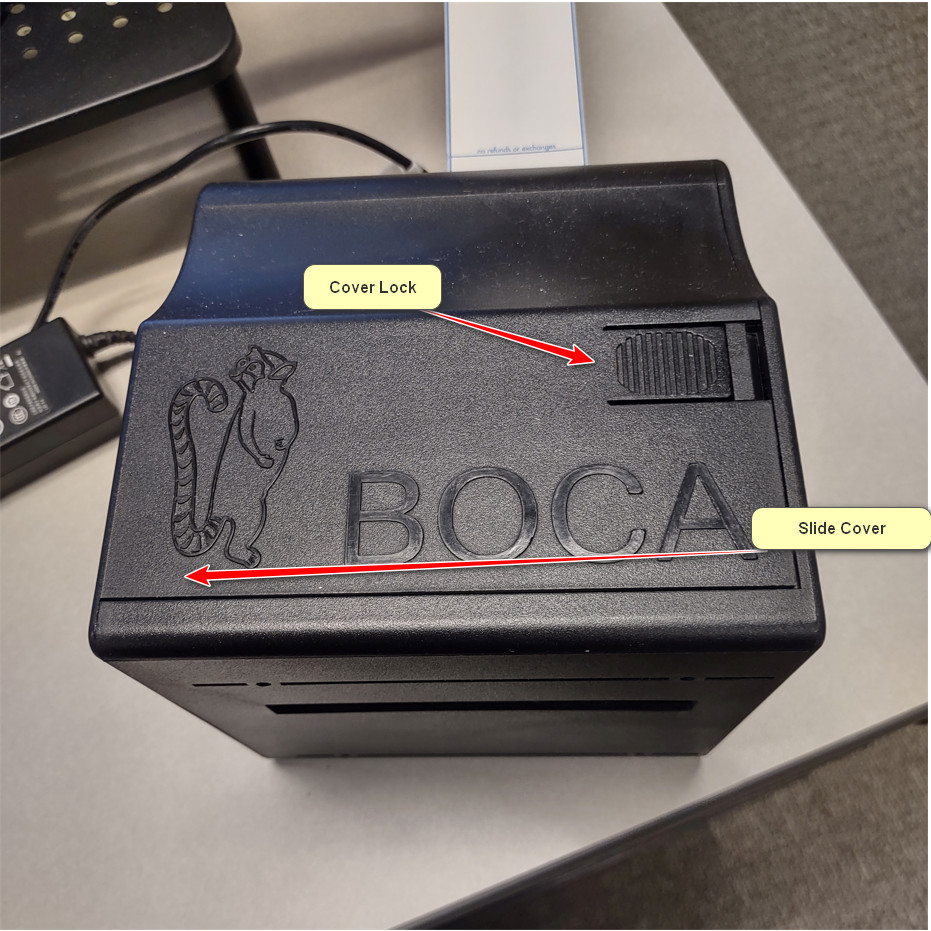
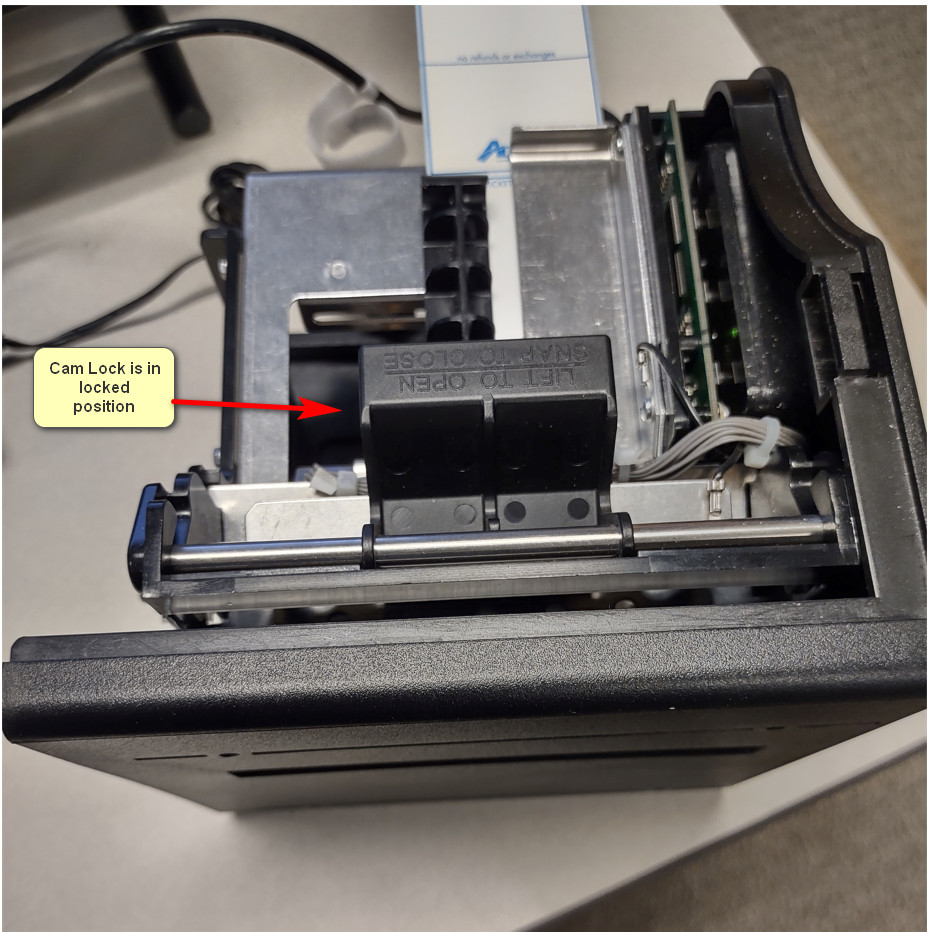
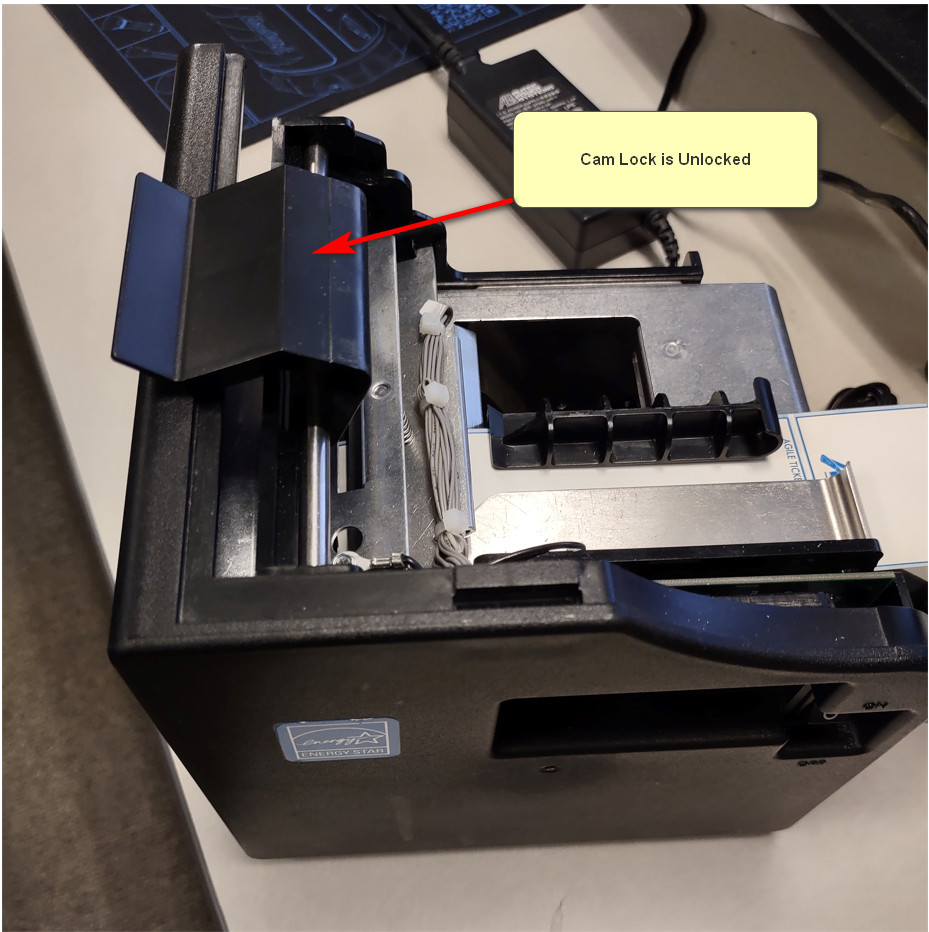
3. Lift up on the cam lock lever assembly (Image 2 and 3) and remove any ticket stock.
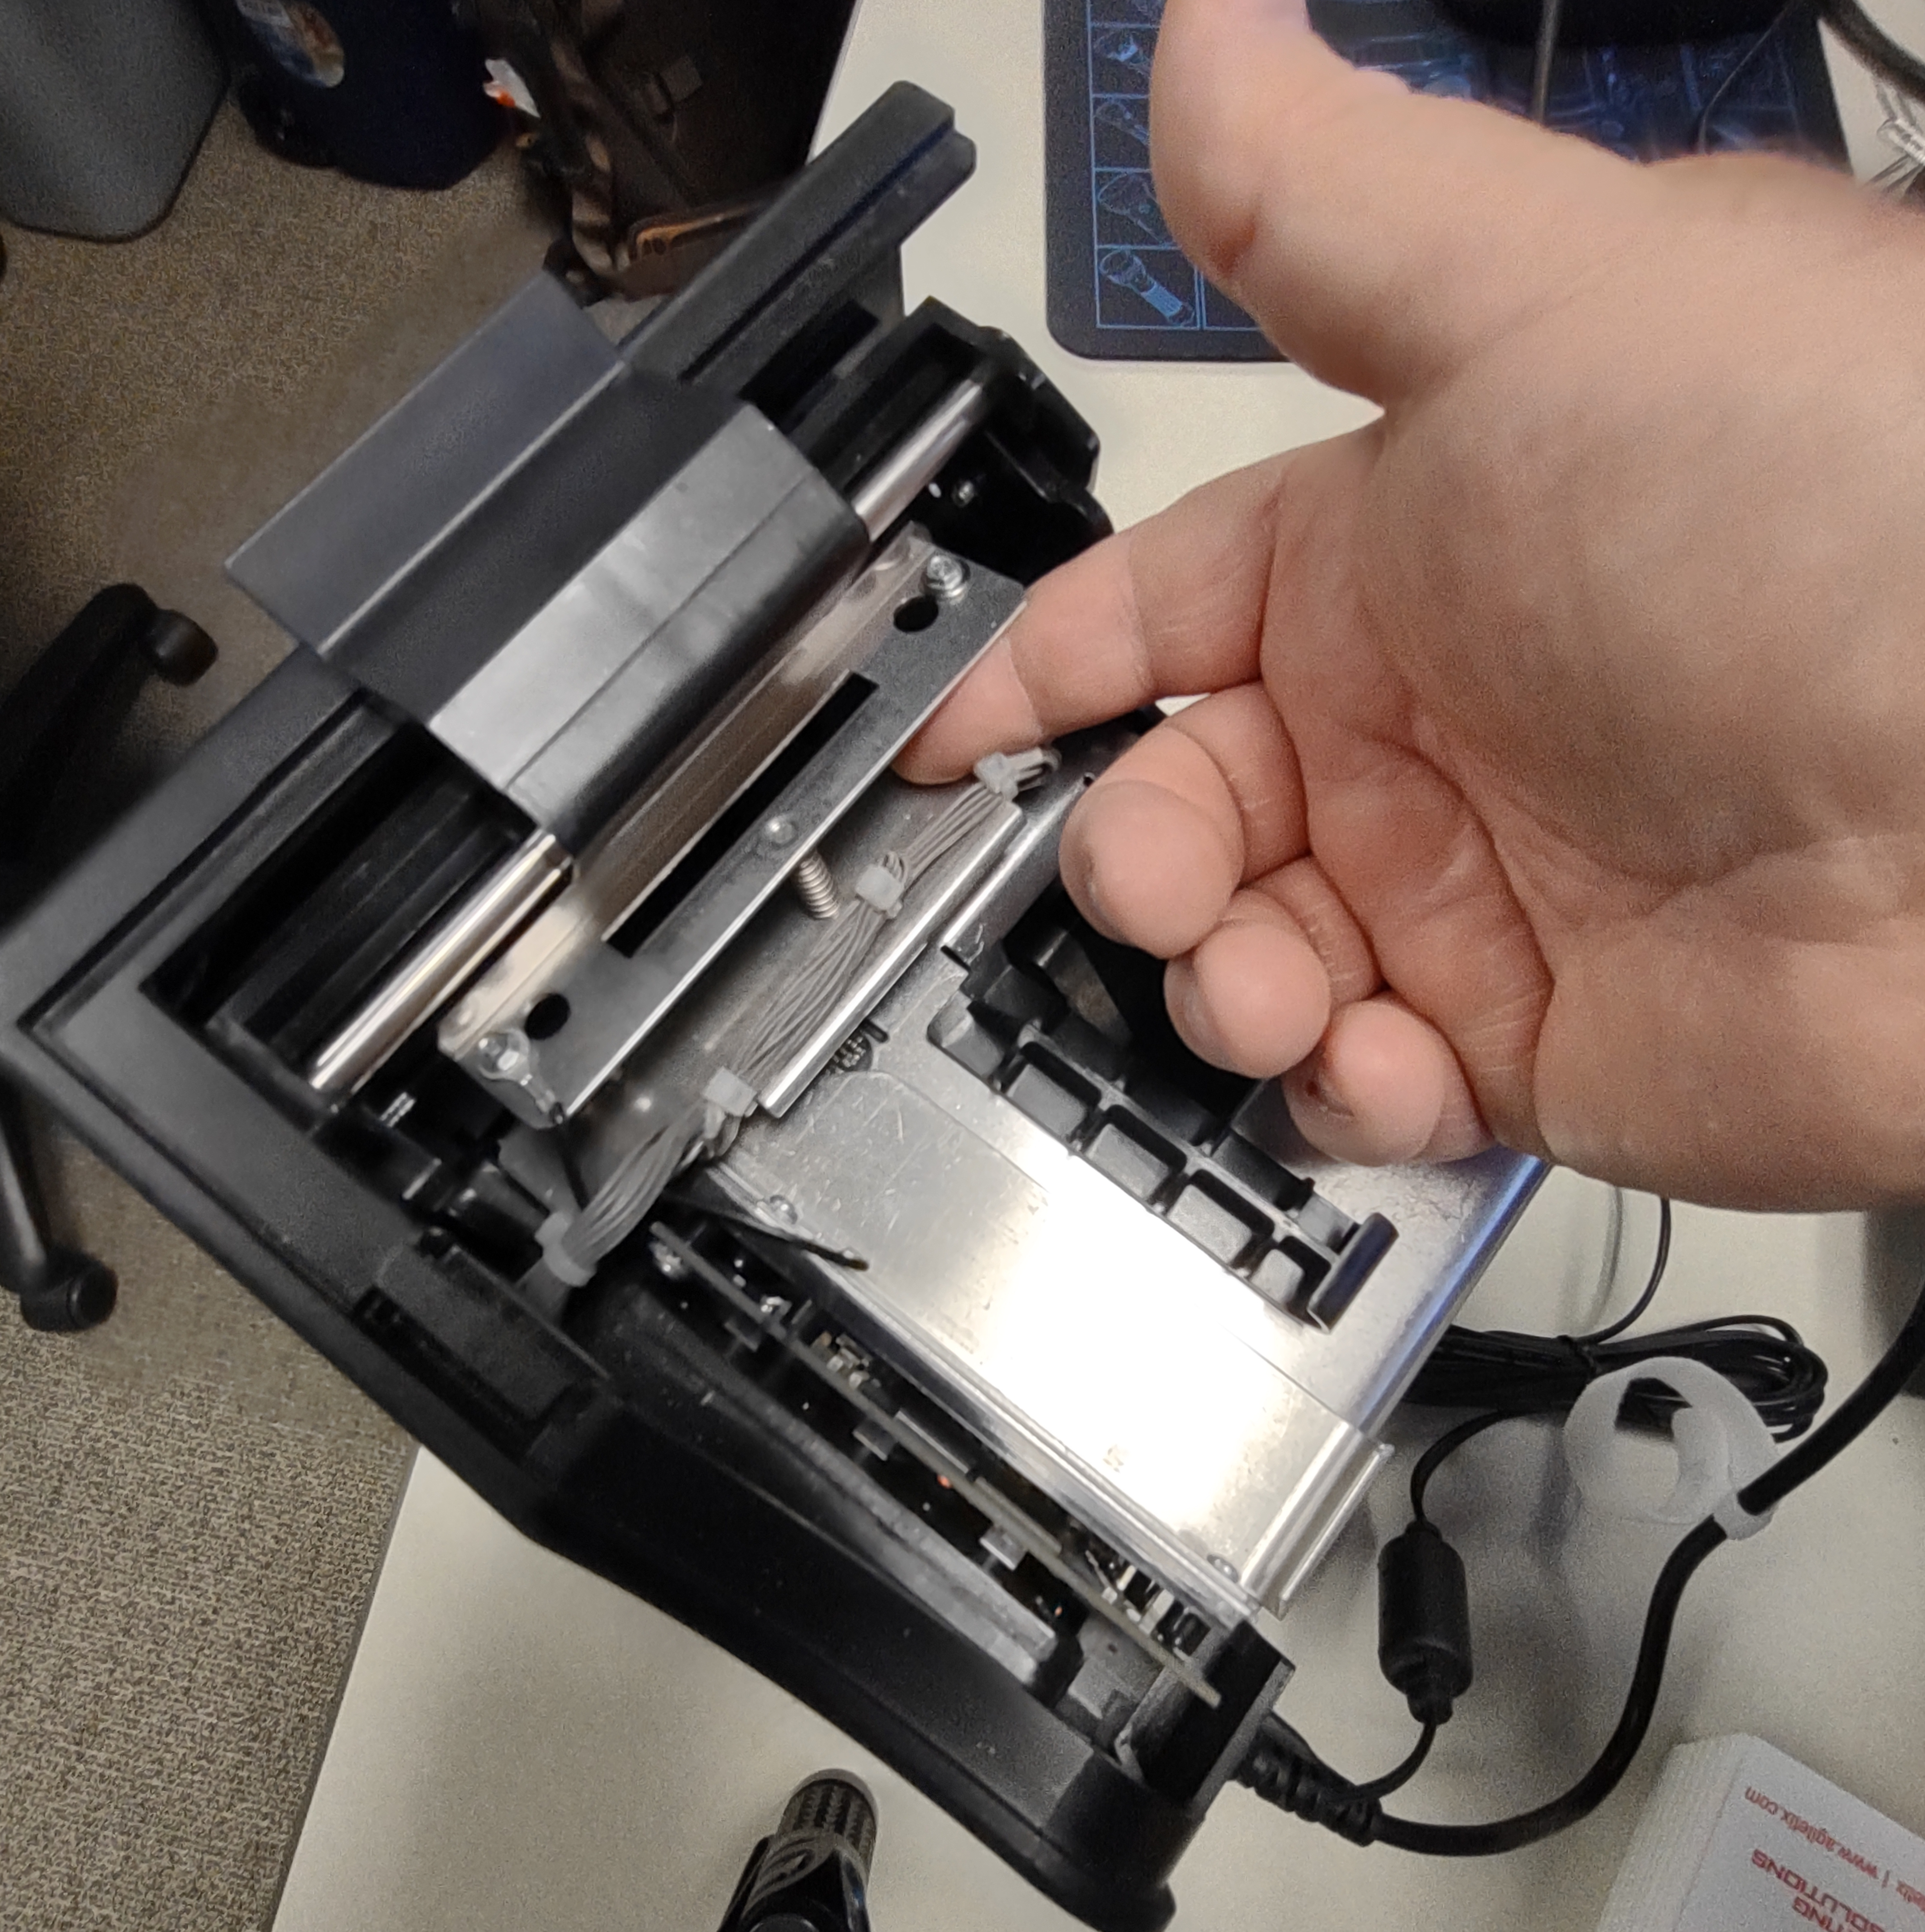
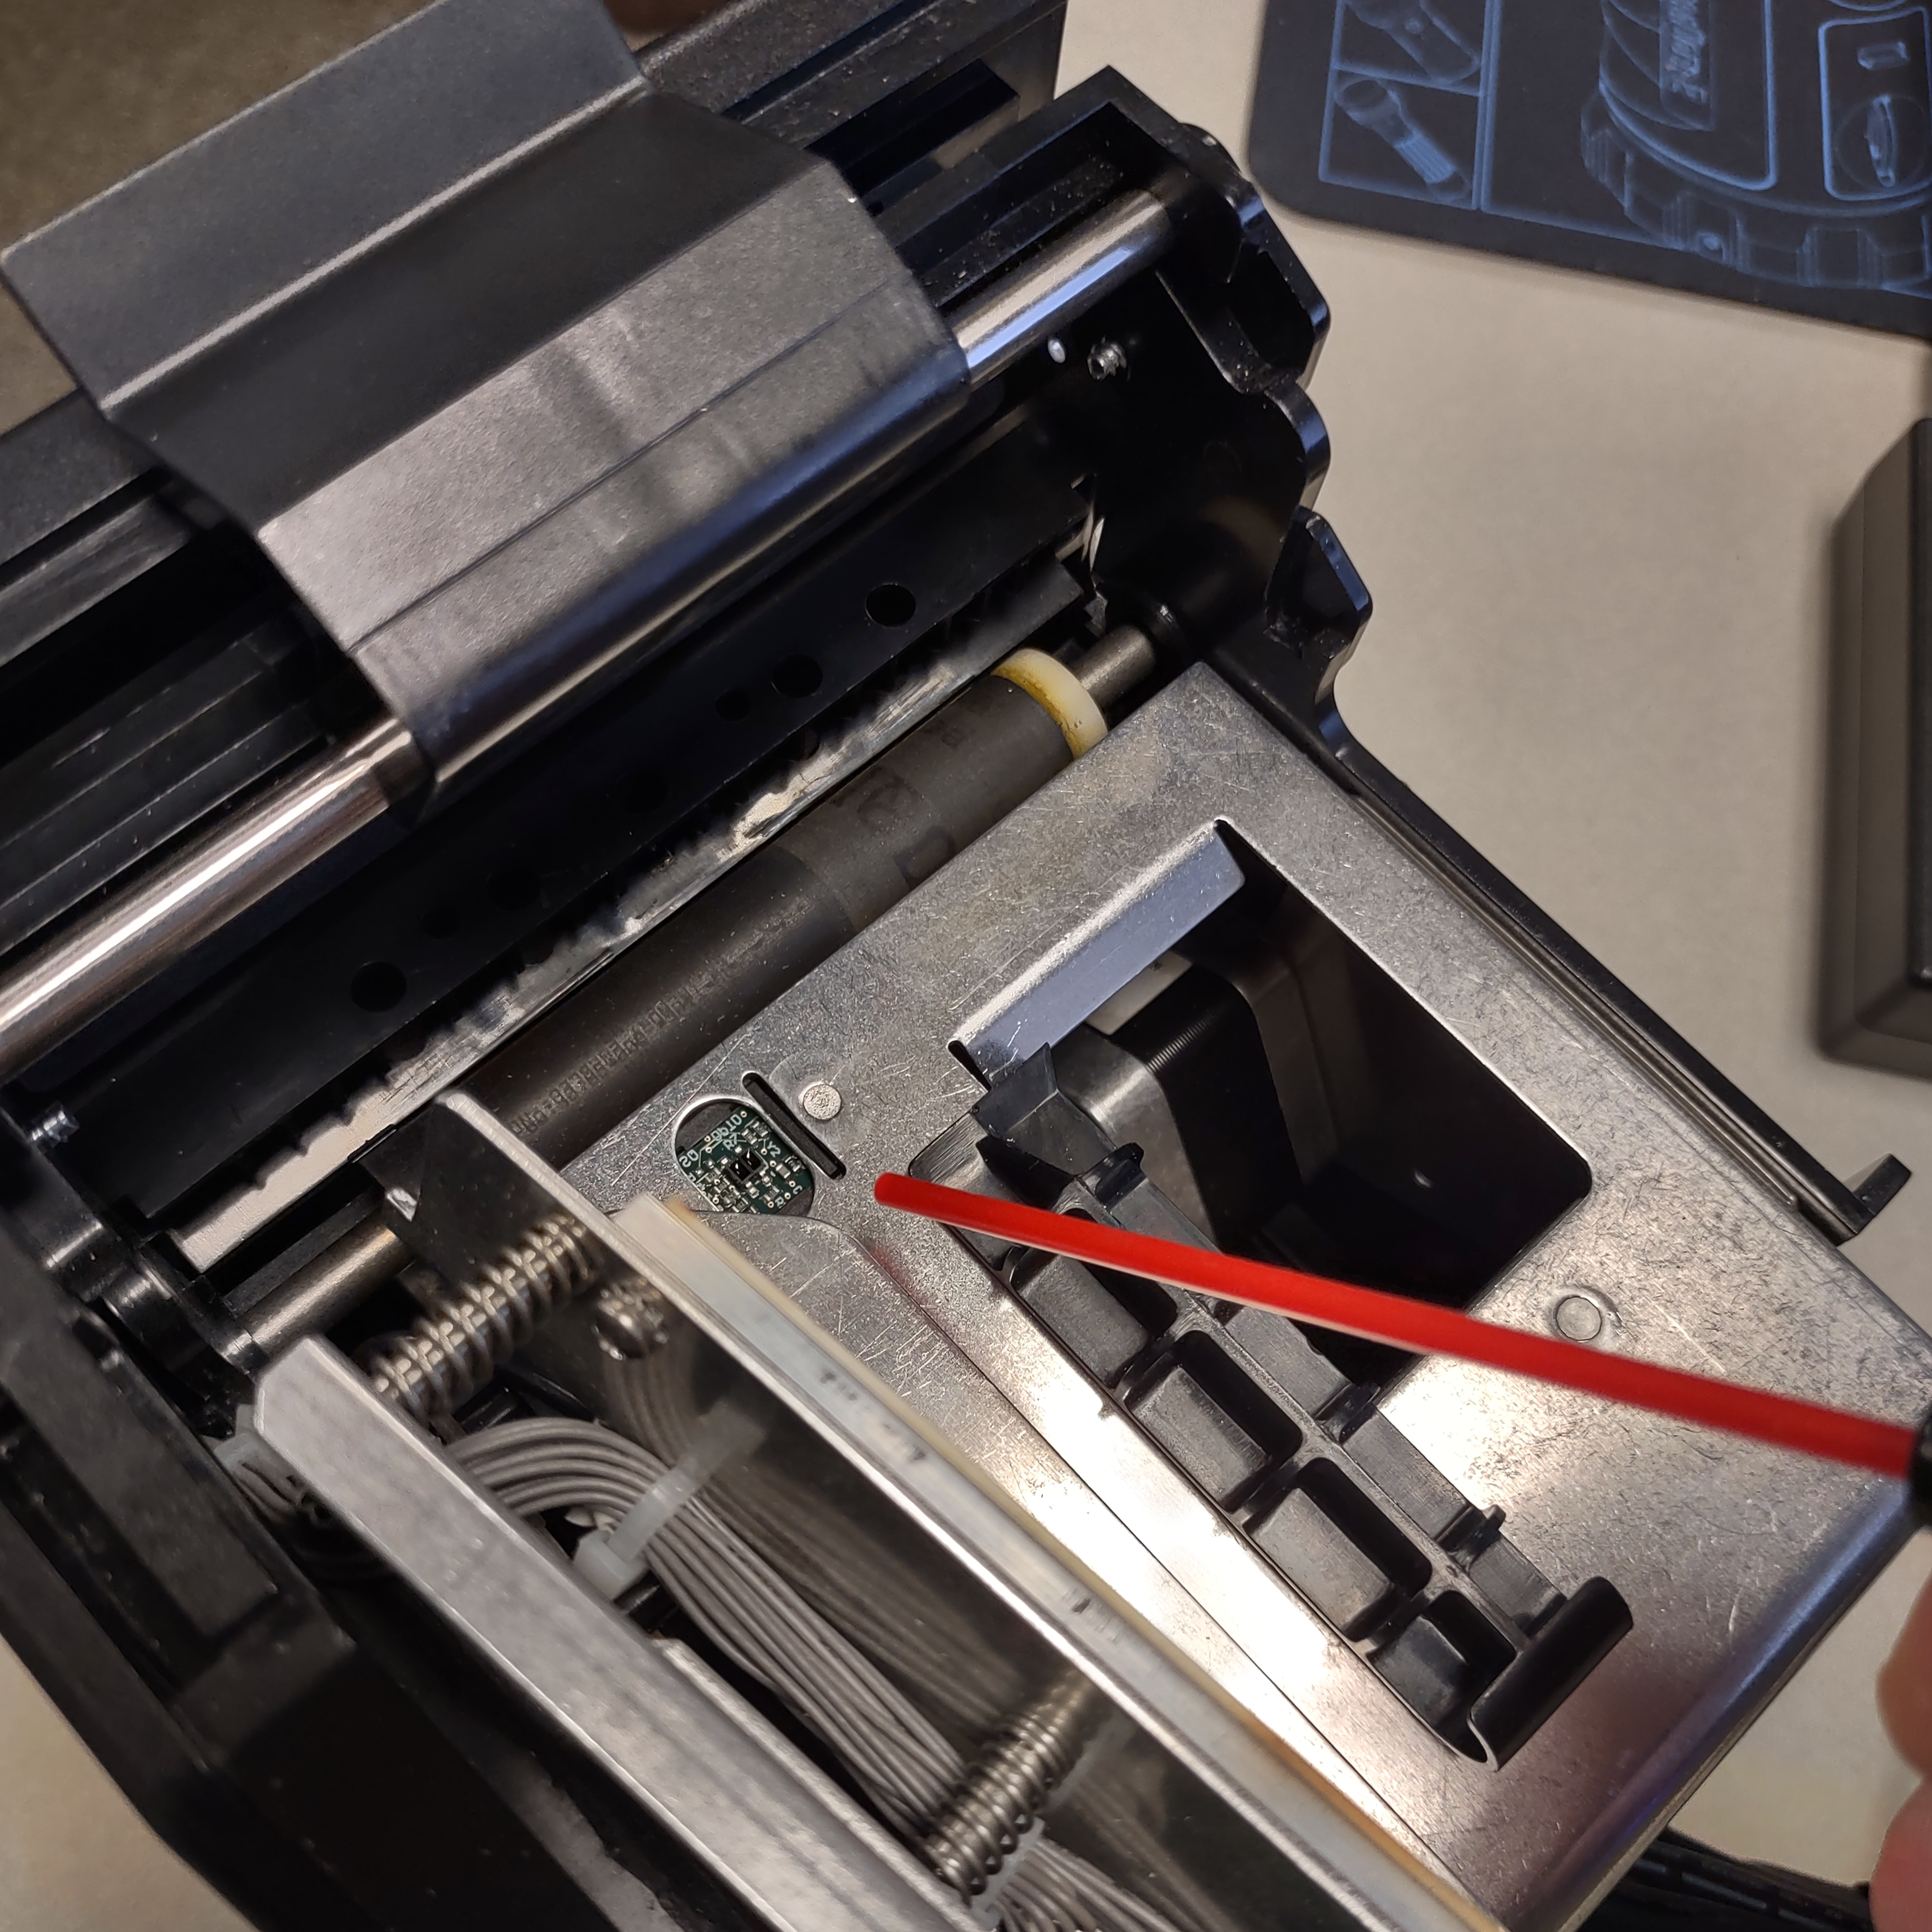
4. The printer's thermal head mount is show in Image 4. DO NOT disconnect any electrical connectors. Also take note of the location fo the metal tabs on each side on the thermal print head mount.
5. Place a finger inside the printer's thermal head mount as shown in Image 5.
6. Lift the thermal head mount by bringing the fingertip toward the palm of the hand (Figure 6) This will lift the front of the munt while rotating toward the back of the printer and allow the thermal head mount to be lifted free of the printer's housing.
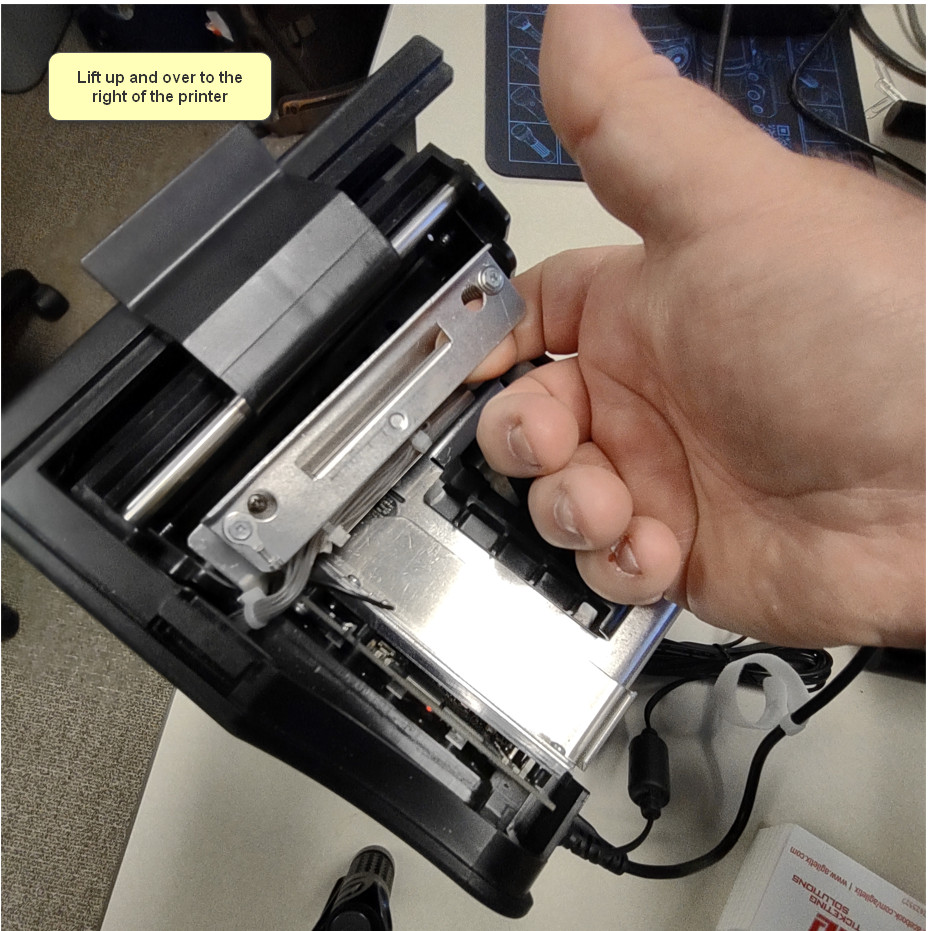
7. Once thermal head mount is free from printer housing, swing it up and to the right side of the printer as shown in image 7 and 8.
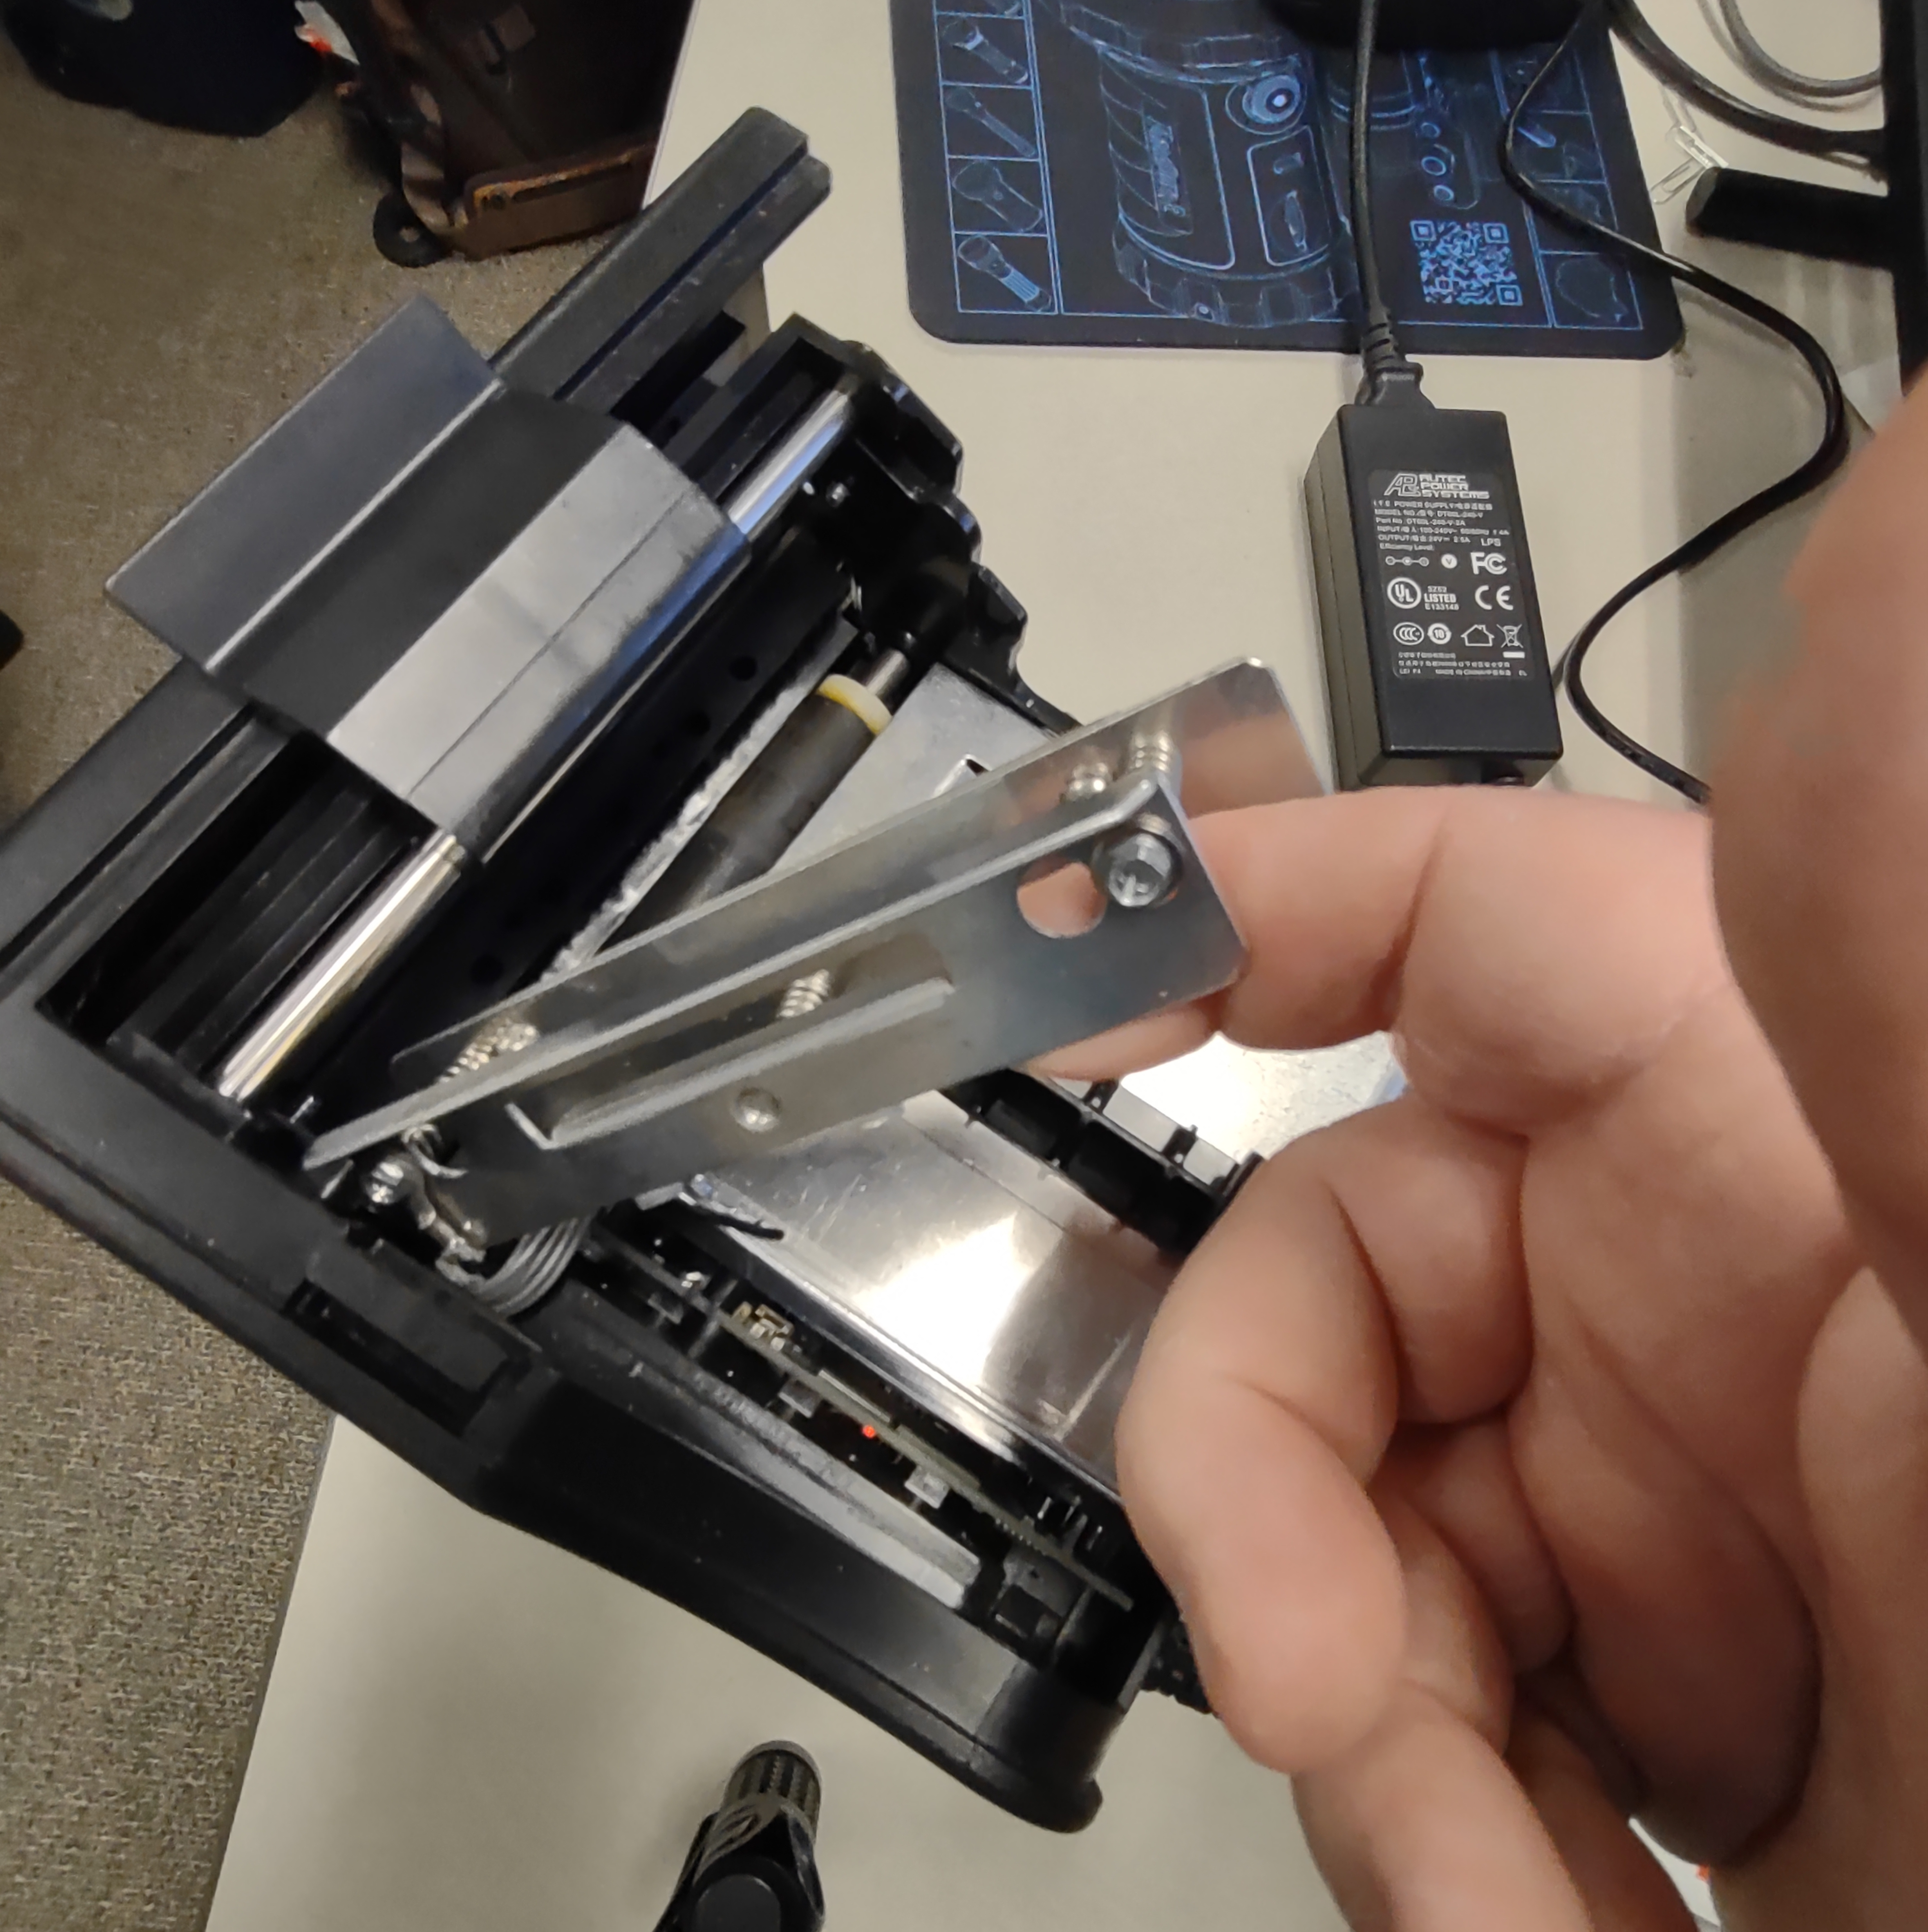
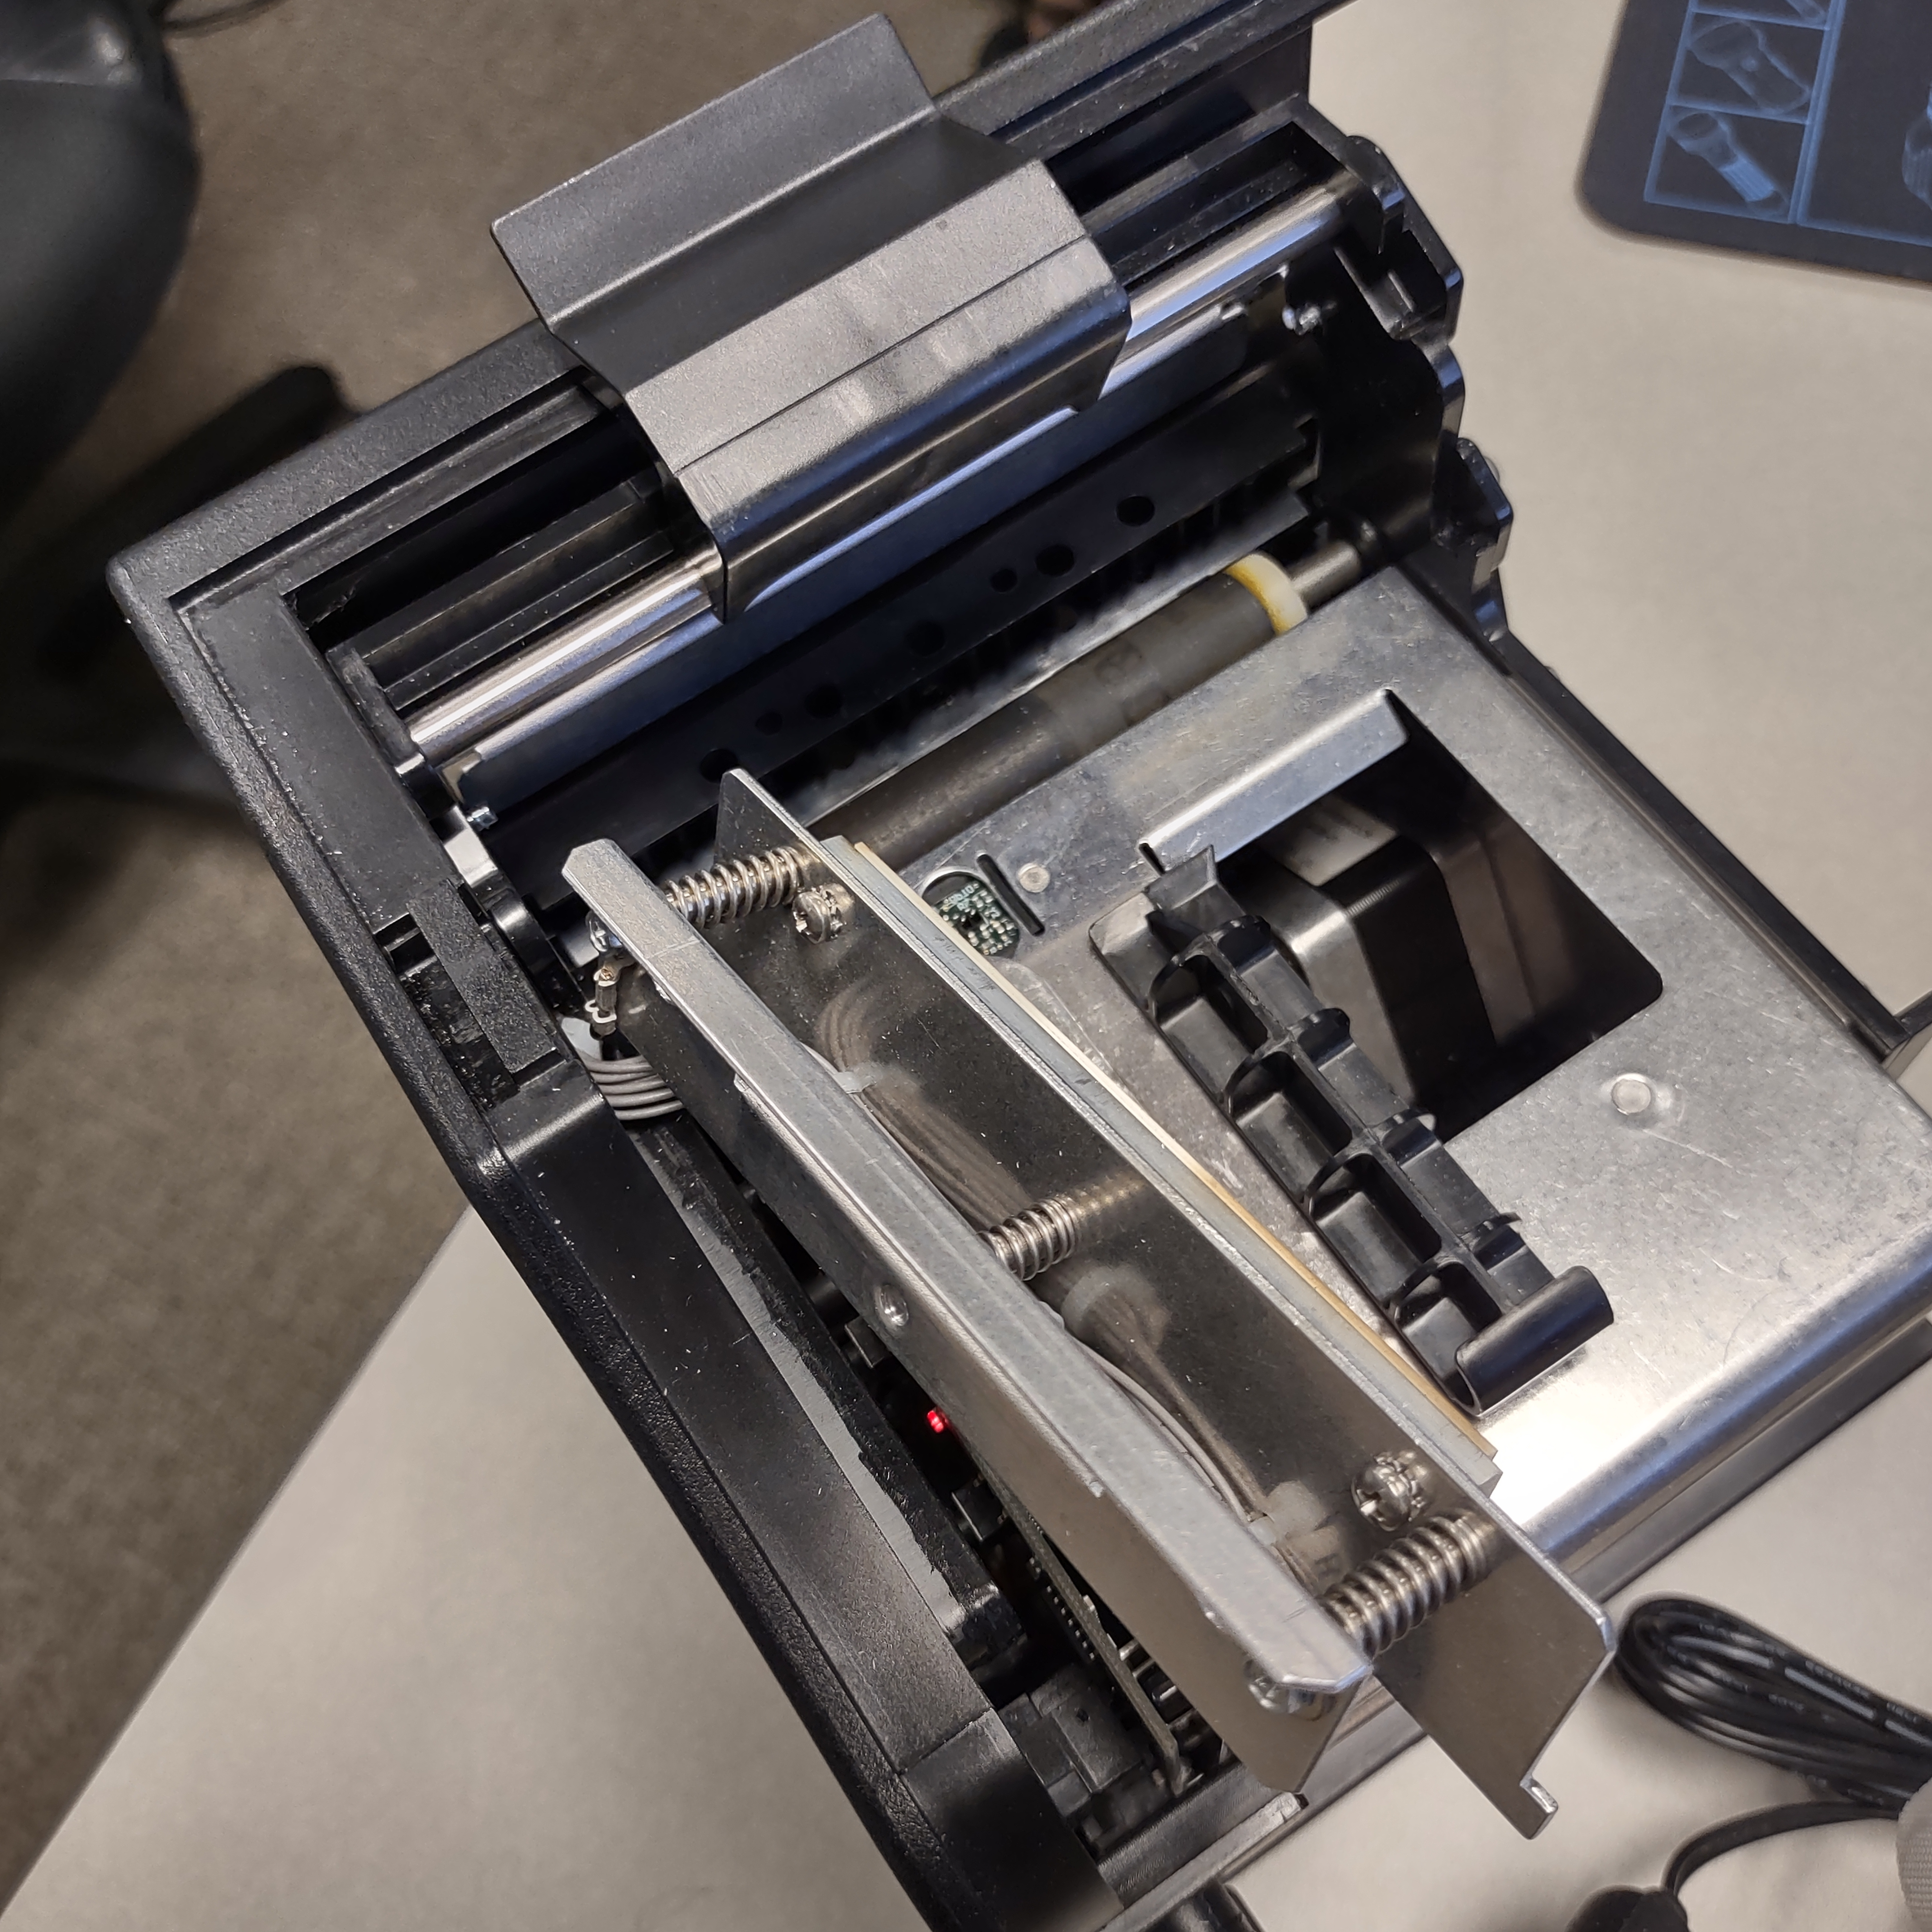
8. Image 9 shows the location of the two optical sensor that need to be cleaned. If your printer does not have a cutter, there will only be 1 optical sensor.

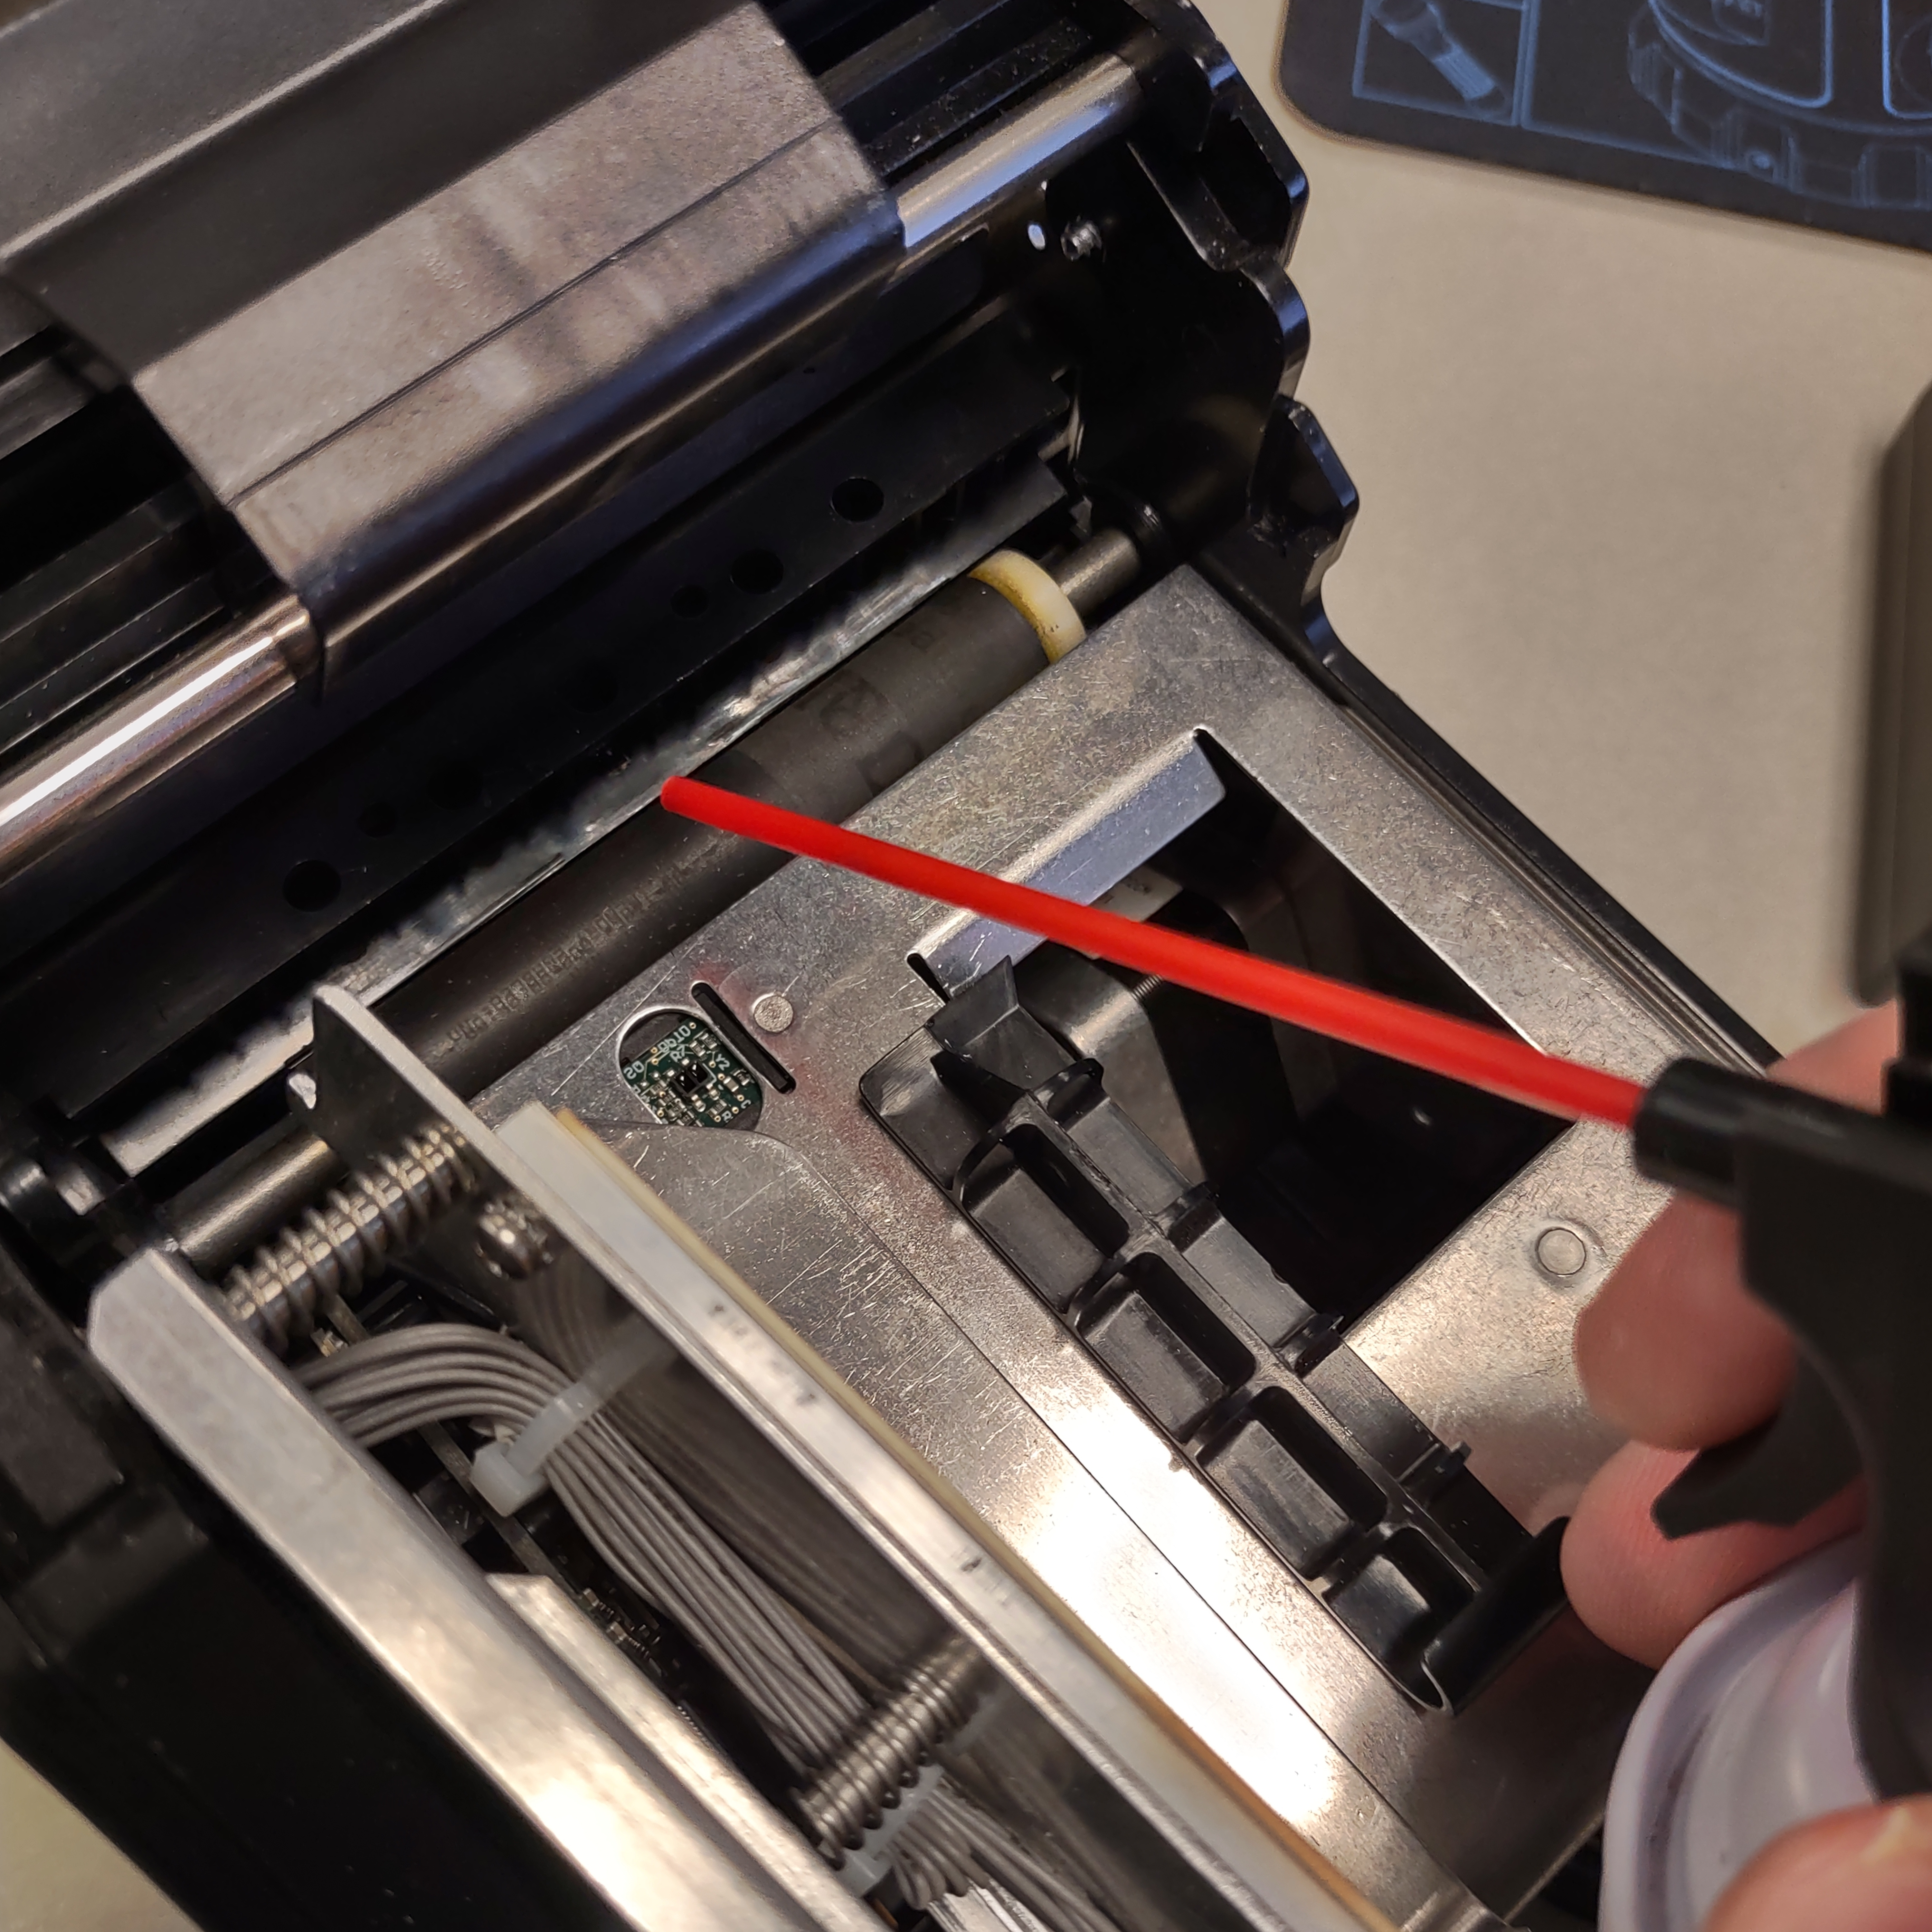
9. As shown in image 10 and 11, blow compressed air at the two optical sensors to remove any paper dust.
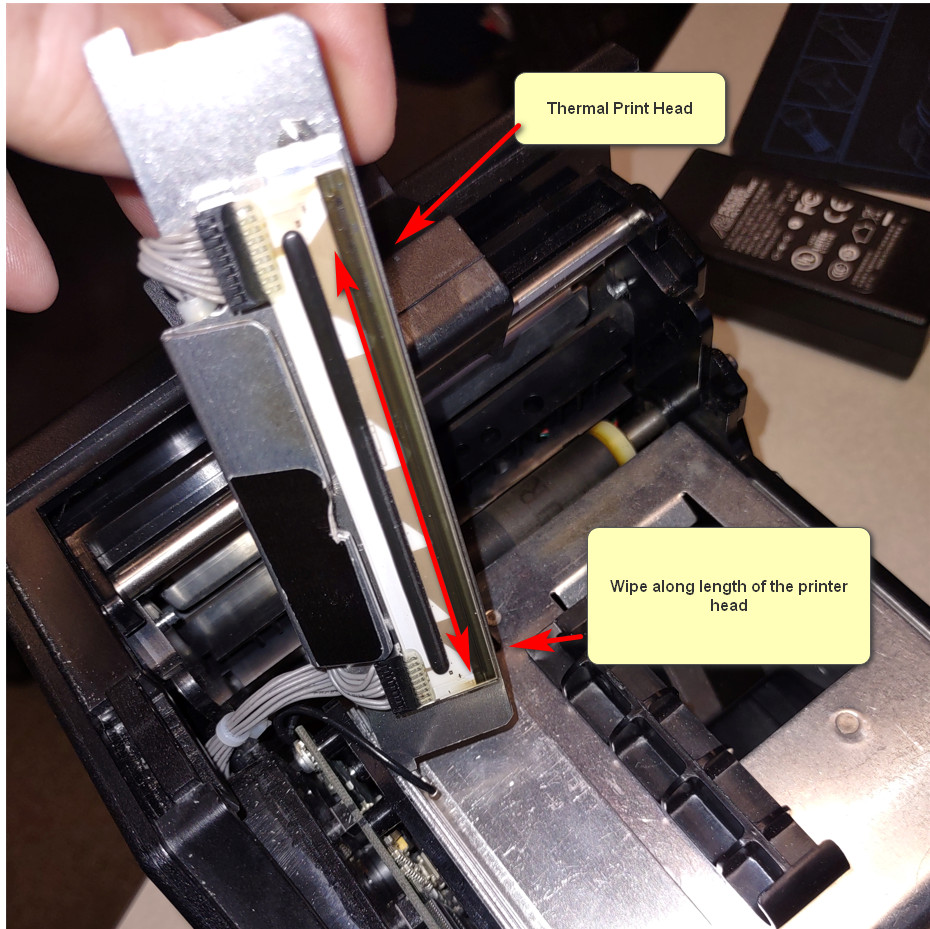
10. Once a year the thermal print head needs to be cleaned. The thermal print head is show in image 12. Spray a soft lint free cloth with isopropyl alcohol and wipe it along the length of the thermal print head. DO NOT spray isopropyl alcohol directly on the thermal print head.
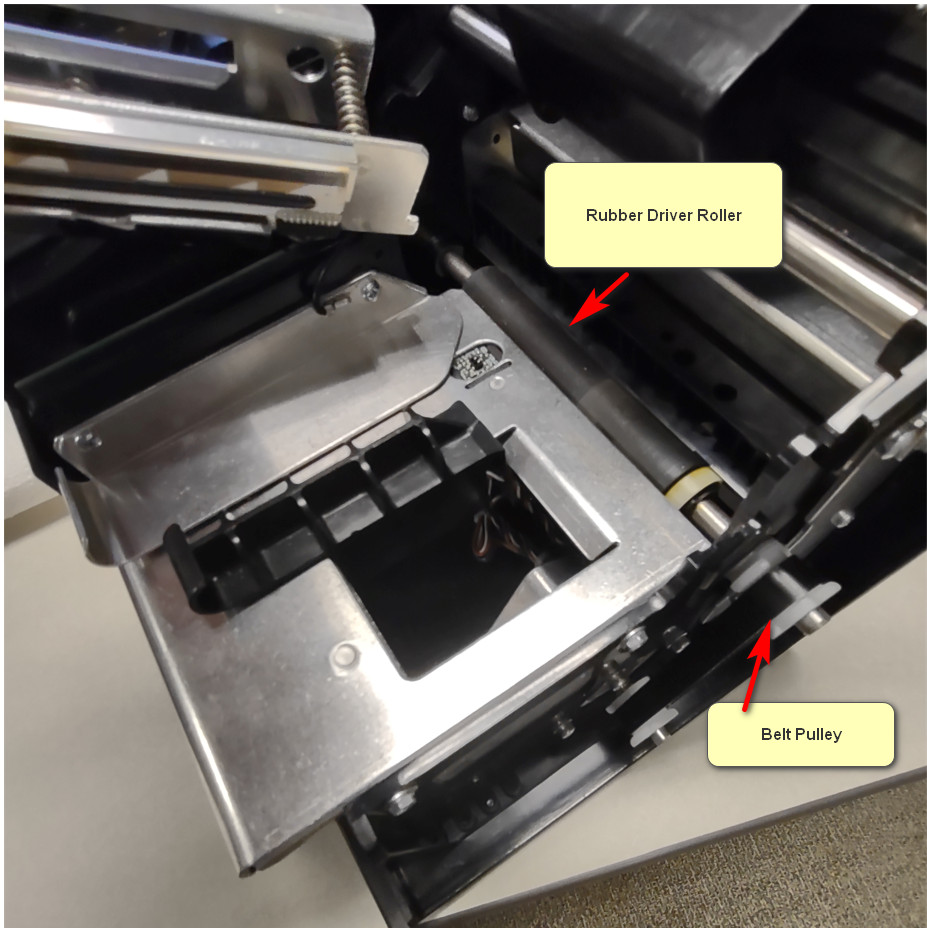
11. Once a year clean the rubber driver roller. Spray a lent free cloth with isopropyl alcohol then wipe the roller. Turn the belt pulley at the side of the roller to expose a new section of the roller to clean. Rotate the roller and clean, repeating until the entire roller is clean. See image 13.
12. Reassemble the thermal print head mount into the printer's housing by holding the mount approximate in place and tilting the front of the mount slightly upward and place the mount's side tabs into the slots as show in Image 4.
13. Move the cam lock assembly into it's lowered position as in image 2.
14. Connect the power supply and any other cables that might have been disconnected.
15. With the printer powered on, feed in the new ticket stock.
16. Press the test button and the center button on the side of the printer to print a test ticket.
17. Next print a test ticket from Agile.
18. Slide the cover back onto the printer.
Comments