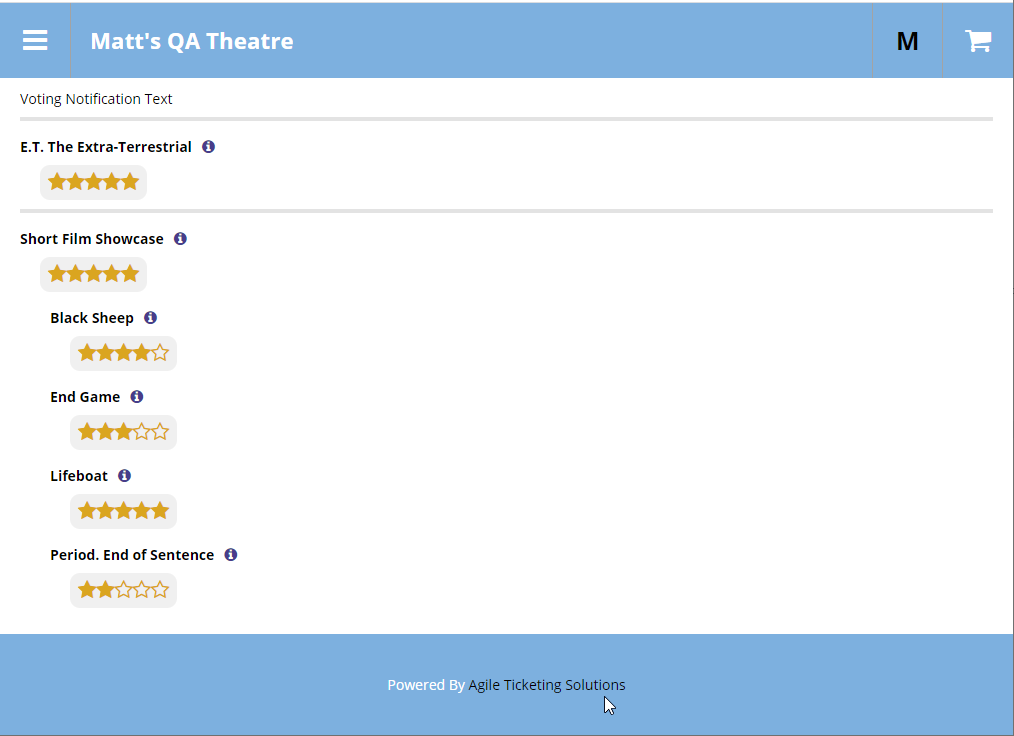
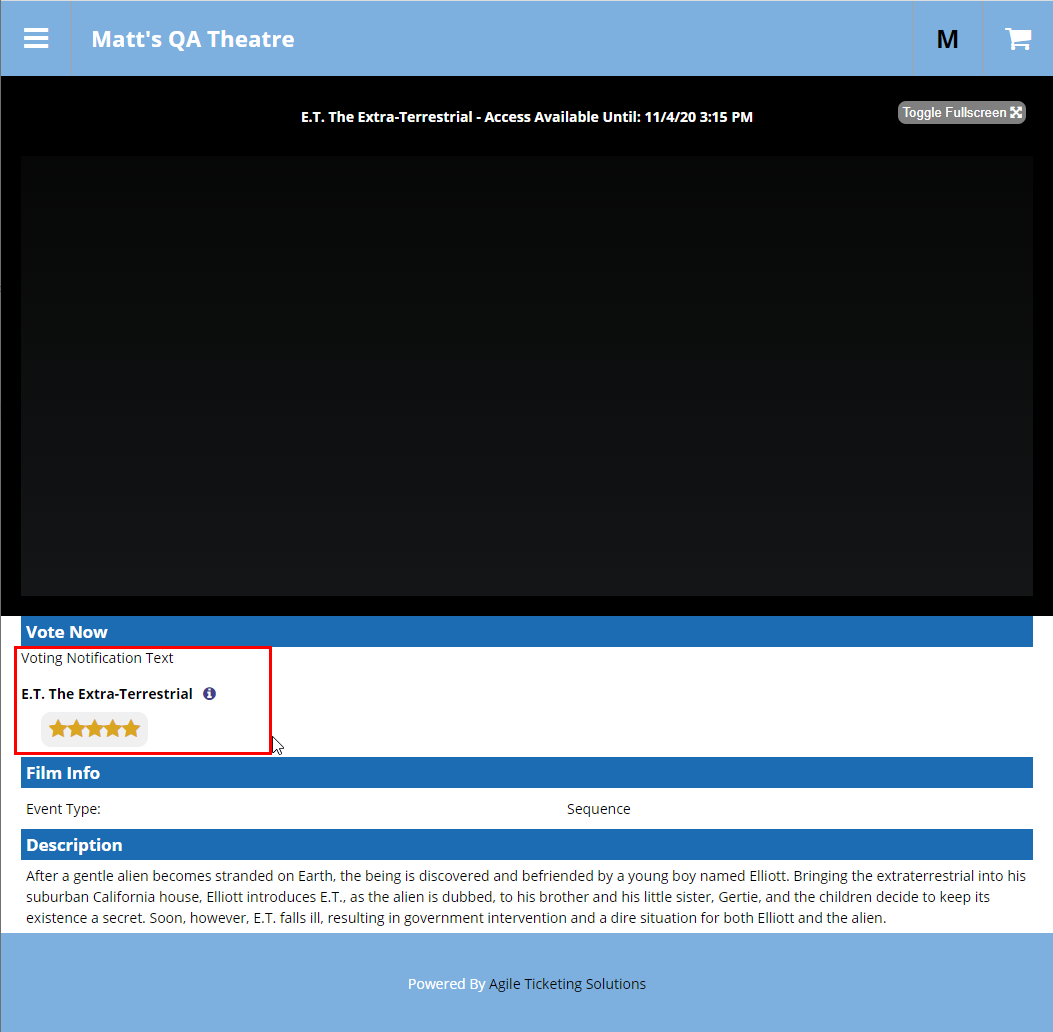
Agile Ticketing has added the ability to allow customers to rank films between 1 and 5 Stars. We have included the ability to define a date window for your customers to start and end voting, an event offset that will allow you to define what events fall into voting, a brand new entry point that aggregates a customers votes for them to see what they have and haven't voted on and how they've voted, as well as a switch that allows you to exclude specific Showings and Shorts from voting if you choose.
Voting
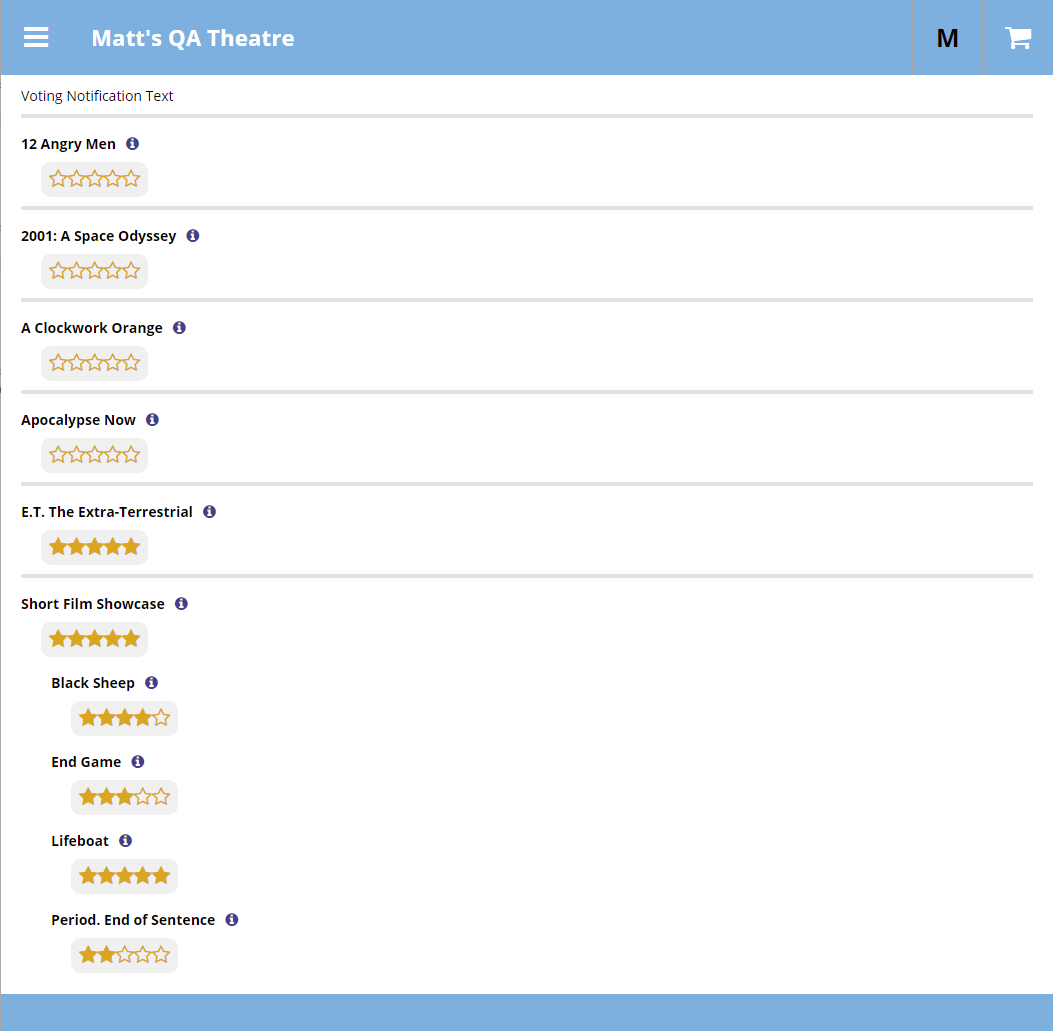
With the new Voting System in Agile your customers are able to cast votes on a 1 to 5-Star ranking scale. Any film that they purchase tickets to will appear in the Ballot Collection Entry Point as long as it meets the following requirements:
- It falls within the Event Date Offsets as defined within the Ballot Collection Entry Point
AND/OR
- It does not have the "Exclude from Voting" switch checked in the Web Control Tab
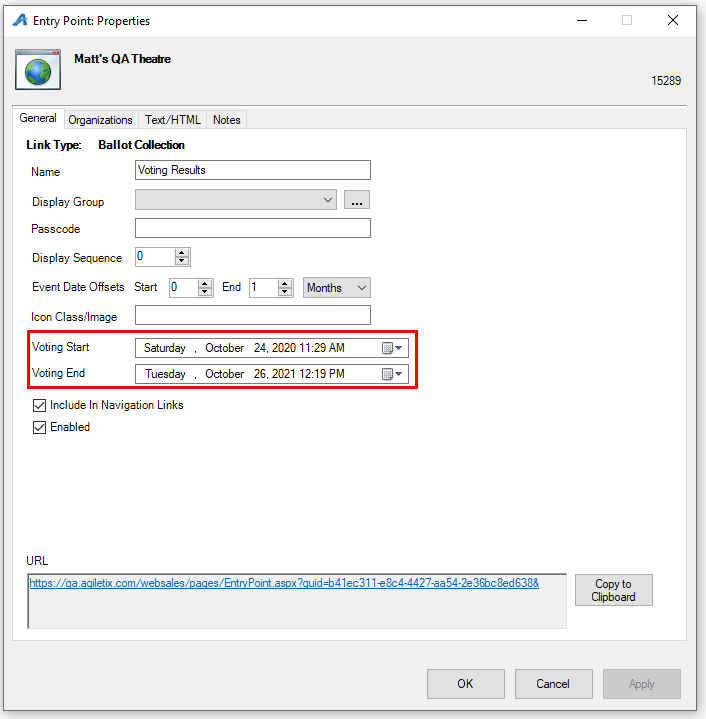
In addition to these settings you also have the ability to define the voting window independently of the Events, Shorts, or Shows that are available for voting. With this, you can set a voting period to start during or even after the start of a festival or run of films to help encourage patrons to watch before actually voting.
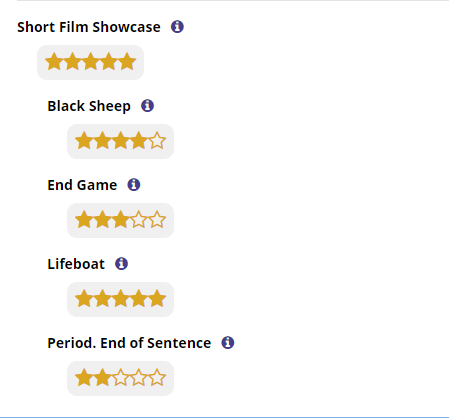
Also, for our clients that utilize Shorts Programs or AgileLINK with Pre/Post-Roll, it is important to note that customers will be offered the opportunity to vote not only on the main show or event but they will also be able to cast votes on any attached Shorts and Pre/Post-Roll content unless the exclusion switch it check.
Ballot Collection Entry Point
To set up the Ballot Collection Entry Point, follow these steps:
1. Go to the Entry Points Node.
2. Select your Entry Point Group.
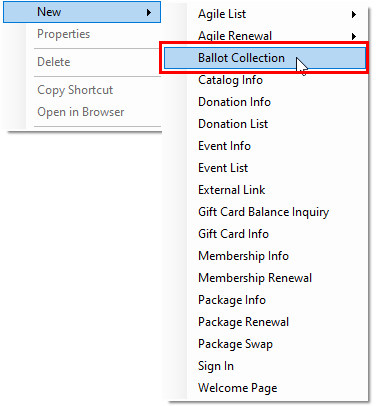
3. Go to the Entry Point window, right-click, hover over New, and select Ballot Collection.
4. Enter a name, keep in mind that if you are going to make this viewable to customers that they will see the name so it should be clear enough for them to understand it's purpose.
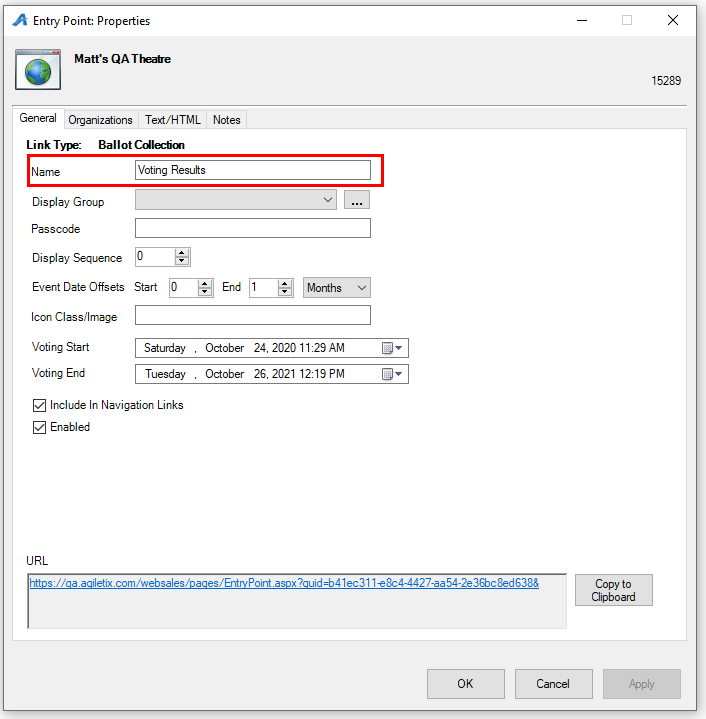
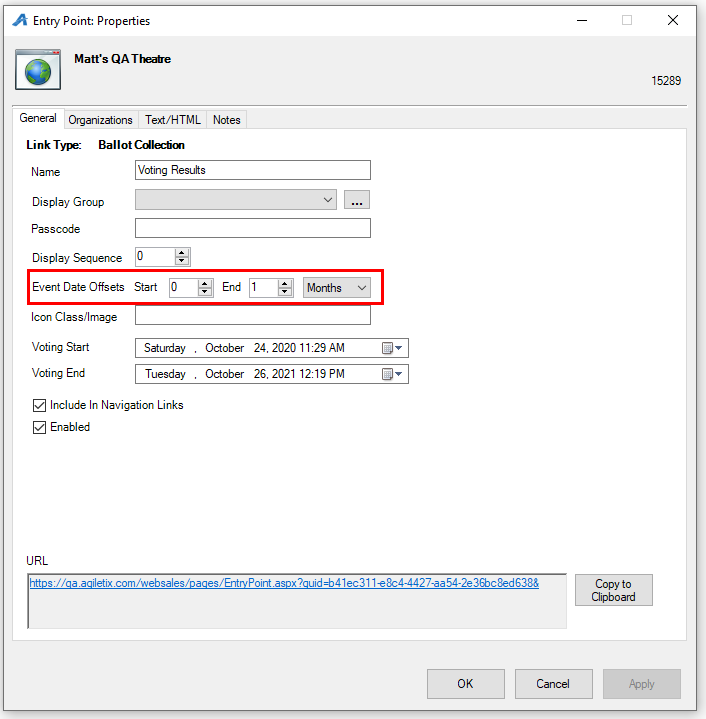
5. Set your Date Offsets (see below for an explanation of usage).
6. Set your Voting Start and End window.
7. Go to the Organizations Tab and add the folder that has the Events or Shorts you want to include.
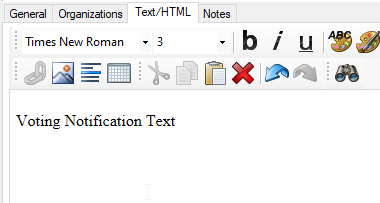
8. Go to the Text/HTML tab. Here you may enter a message that will be viewable on BOTH the Ballot Collection page AND any Streaming pages where voting has been enabled.
-Text/HTML Tab
-Ballot Collection Entry Point
-Voting on a Streaming Page
9. Hit Apply and Ok to save your settings.
Voting Exclusion
There are two ways you can exclude an item from Voting: Use the Event Date Offset or Setting the Exclusion Switch
Event Date Offset
In the Ballot Collection Entry Point Properties, you will find the Event Date Offset setting on the General Tab.
This is used to broadly choose what events are available to be voted on. You will need to set a time frame in either Days, Weeks, or Months.
You can choose to start with a negative or positive number but your End number will almost always need to be positive.
Setting the Exclusion Switch
1. Go to the Showing or Short that you wish to exclude from voting.
2. Right Click and select Properties.
3. Go to the Web Control Tab.
4. Check the "Exclude from Voting" box.
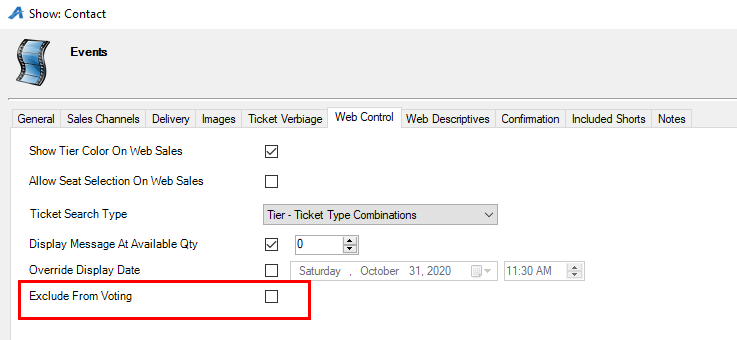
5. Hit Apply and Ok to save your changes.
Comments