Want to learn more? Sign up today for our ATSU Learning Webinar: Everything You Need To Know About Ticket Packs and Account Benefits.
Clients are now able to create account benefits that are associated with a customer's account by building a Ticket Pack or Pass as a Catalog Item. The customer can then access these benefits by logging in with their email or username and password. Note: The customer must have an email address, username, and password associated with their customer record in order to access these benefits. Therefore, ticket packs cannot be purchased or used with the guest checkout process.
1. Log in to Administration.
2. Click on the House Organization icon 
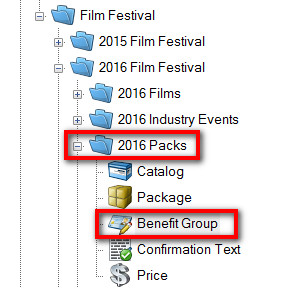
3. Open the Blue Organization folder that houses your Catalog and Benefit Groups.
4. In the Blue Organization folder, click on the Catalog icon.
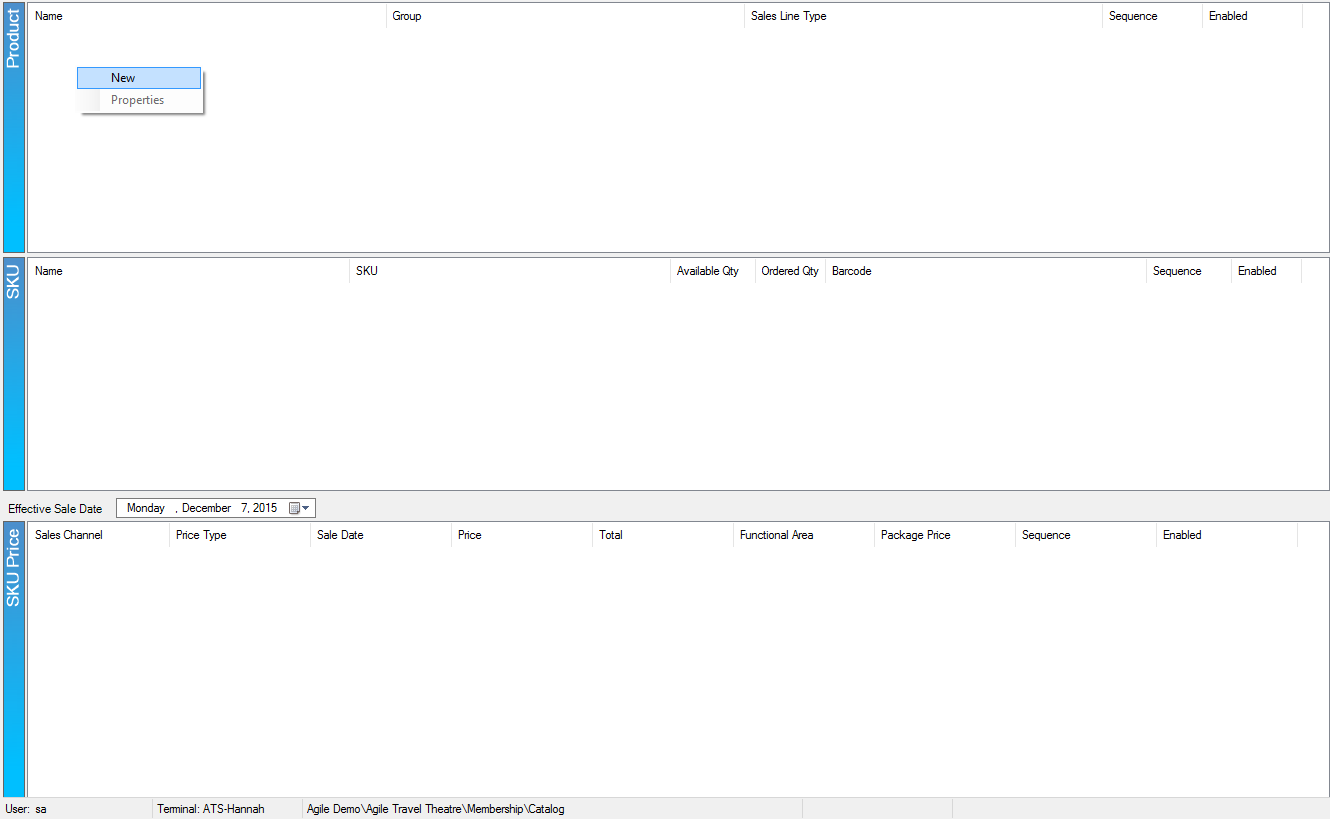
5. Right-click in the Product area and select New.
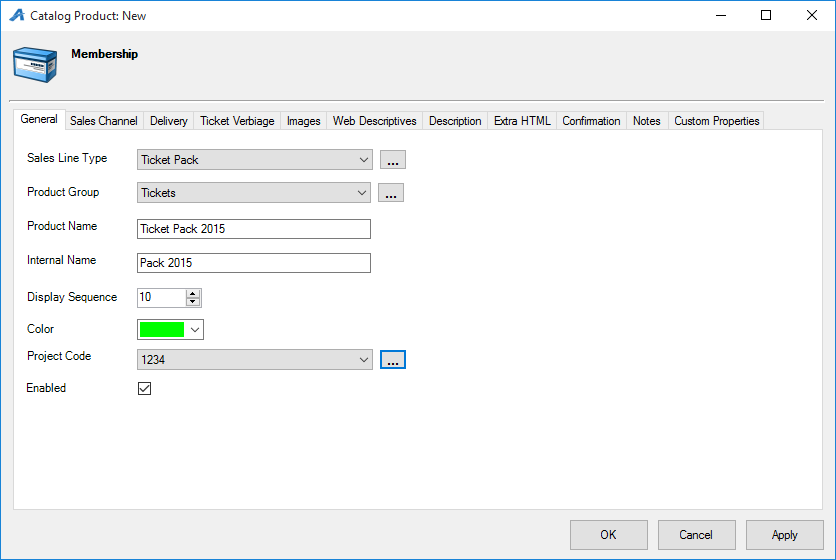
6. Fill out the information under the General Tab.
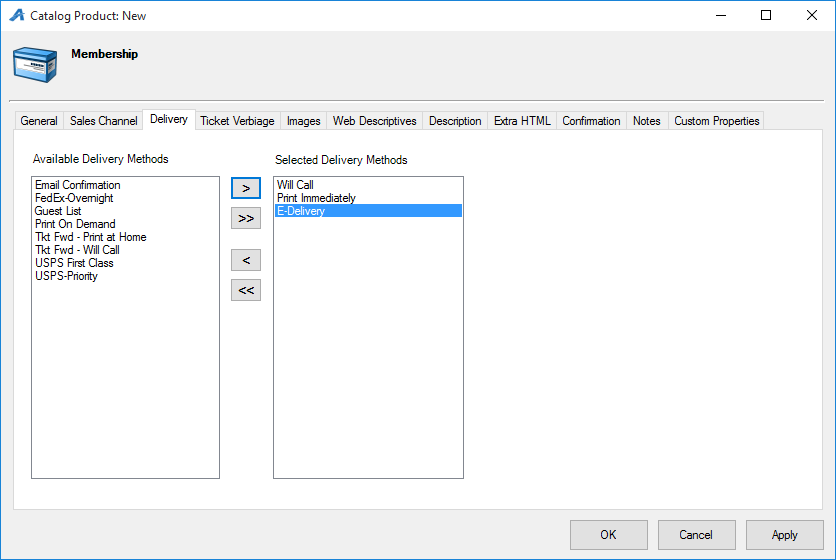
7. Next go to the Delivery Tab and select your delivery methods.
8. Click Apply and OK.
9. Next you will need to create your Benefit Groups. Click on the Benefit Group icon.
![]()
10. Right-click in the Benefit Group area and select New.
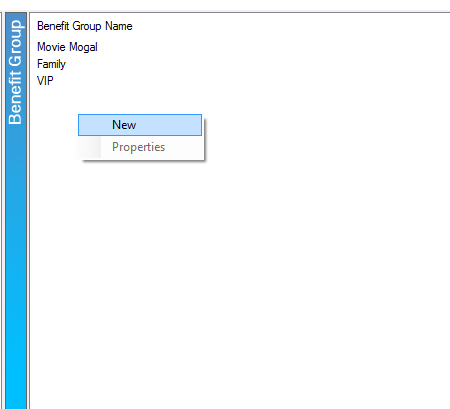
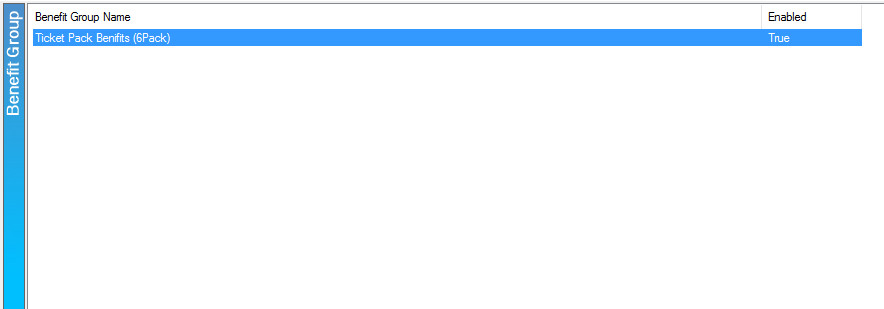
11. You will need to name your Benefit Group. We highly recommend that you add the year to this Name (i.e. Ticket Pack 2015) to help prevent confusion in future years.
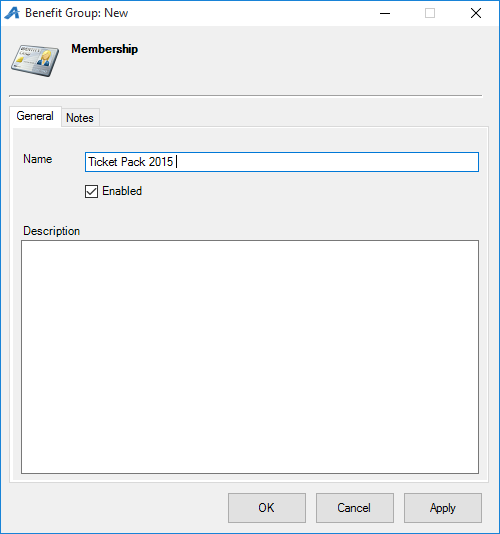
12. Click Apply and OK. Now go back to Catalog to create the inventory and pricing.
13. Right click in the SKU area and select New.

14. You will need to Name your SKU (we recommend something similar to the Product name).
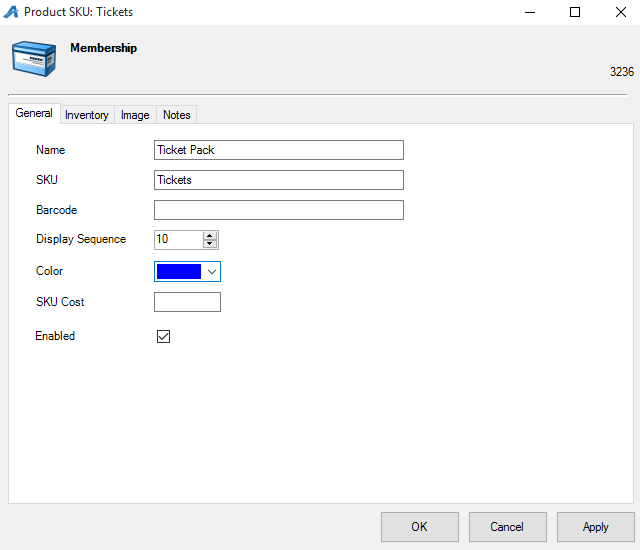
15. Enter in a title for SKU (this can be the same as the Name).
16. Click on the Inventory tab and specify the quantity available for purchase.
- If there is no limit to the number available for purchase, checkmark Unlimited Quantity Available. Once you have your inventory set, click Apply and then OK to close the screen.

- If you have a limited inventory, then enter the number of items available in Adjust Available Quantity field. Once you have the inventory set, click Apply and then OK to close the screen.

17. Next, you will build the price of your ticket pack in the SKU Price area. Right click and select New.

18. In the Product Price: New pop-up, right click and select New Price to build the Ticket Pack Price. Remember to build all prices for members and non-members, plus include all sales channels that the ticket pack will be available for purchase under.
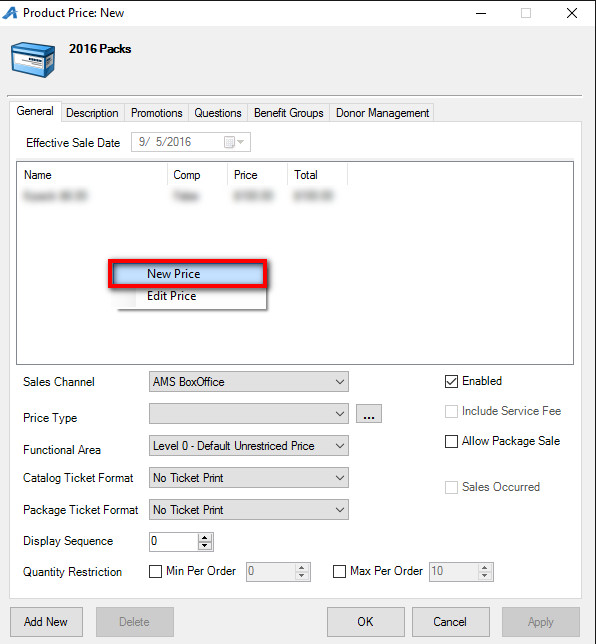
19. Once the price has been added, select the first price that you will be building and add the Price Type and the Display Sequence. If this is a member discount, make sure to name it correctly and then assign a restriction in the Functional Area drop down.
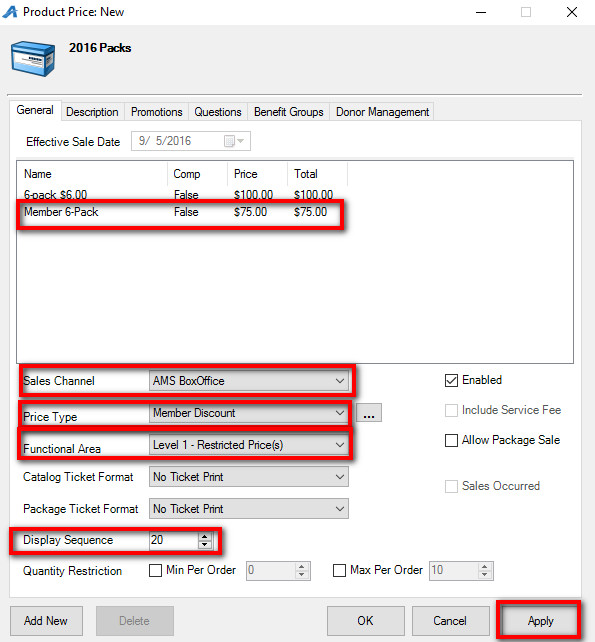
20. Once you have everything assigned on the General tab, click Apply to save the information but keep the window open.
Note: You do not need to check the Allow Package sale unless you are creating a package price.

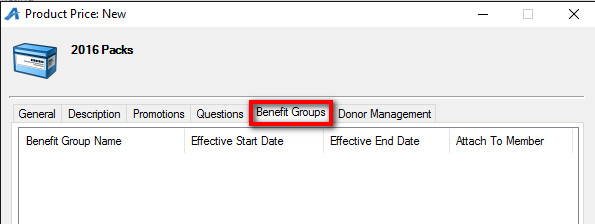
21. Next, you will click on the Benefit Groups tab.
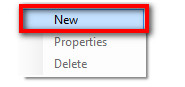
22. In the Benefit Group window, right-click and select New.
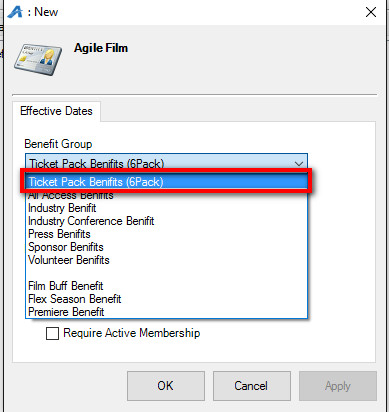
23. In the Benefit Group drop-down, select the Benefit Group that you created in Step 10.
24. Next, you will select the Effective Start Date that this benefit will be available.

25. Next, you will select the Effective End Date that the benefit will no longer be available.

26. If you want this Ticket Pack to be attached to a membership, check mark Attach to membership when used for purchase and Require Active Membership.
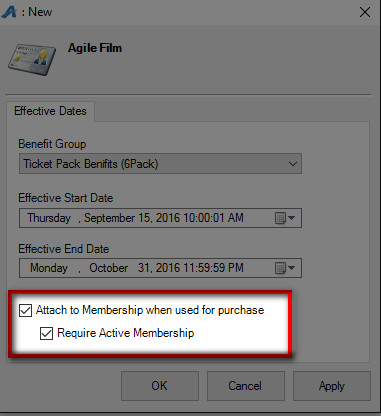
27. Click Apply and OK to finalize applying the Benefit Group to that price type.

28. Repeat Steps 18 - 27 for any additional prices and sales channels.
29. Build a Redemption Ticket in your Events/ Shows. To learn how to add a ticket price to an event or show, click here for instructions. We recommend calling it "2016 Ticket Pack Redemption" or something easily identified by the customer.
30. Once you have built your Redemption Tickets for your Events/Shows, go back to the Benefit Group in your folder to create the Benefit.
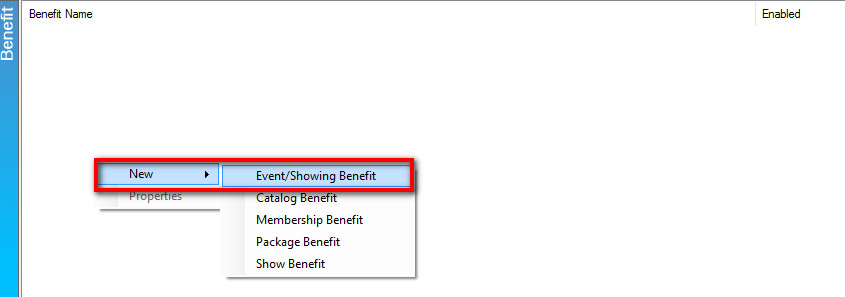
31. Highlight the Benefit Group.
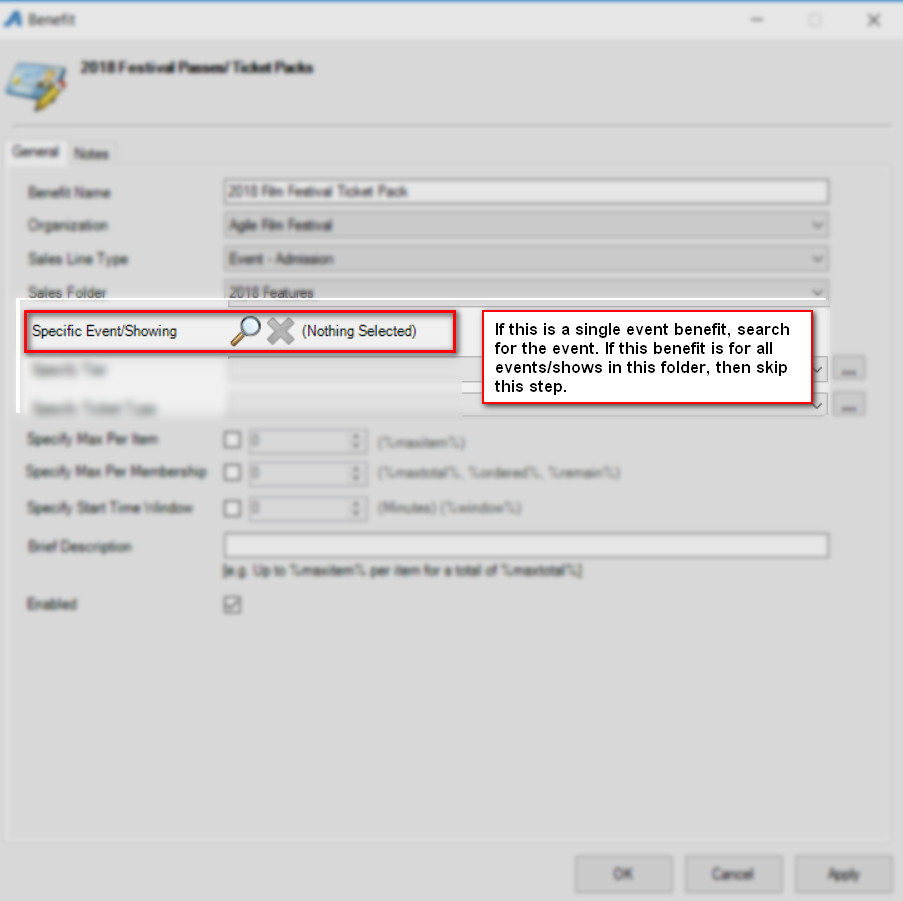
32. In the Benefit area, right click and select New Event/Showing Benefit.
33. Create the Benefit Name.
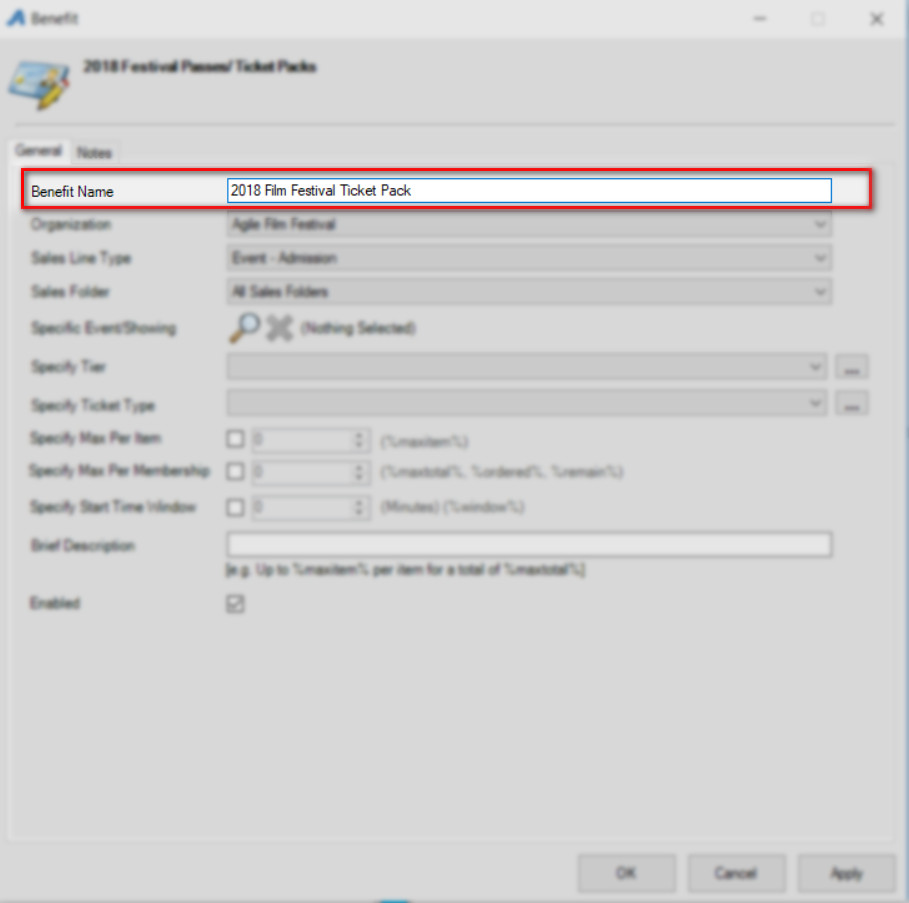
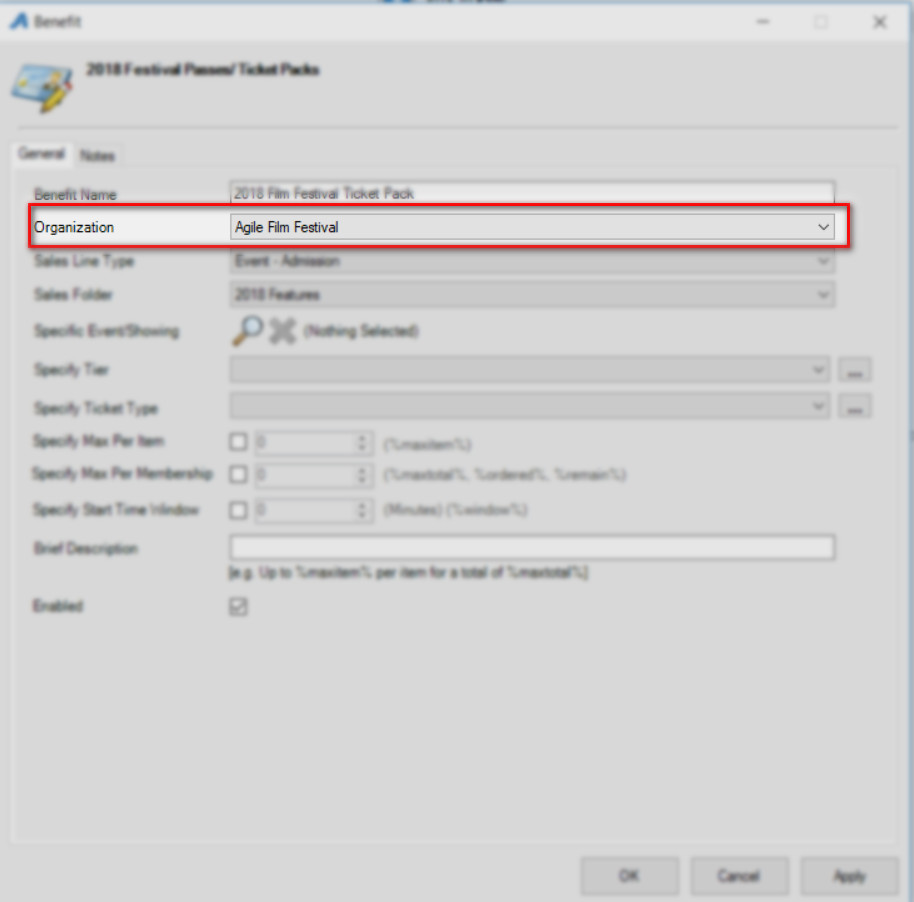
34. Select the Organization that these benefits will be available.
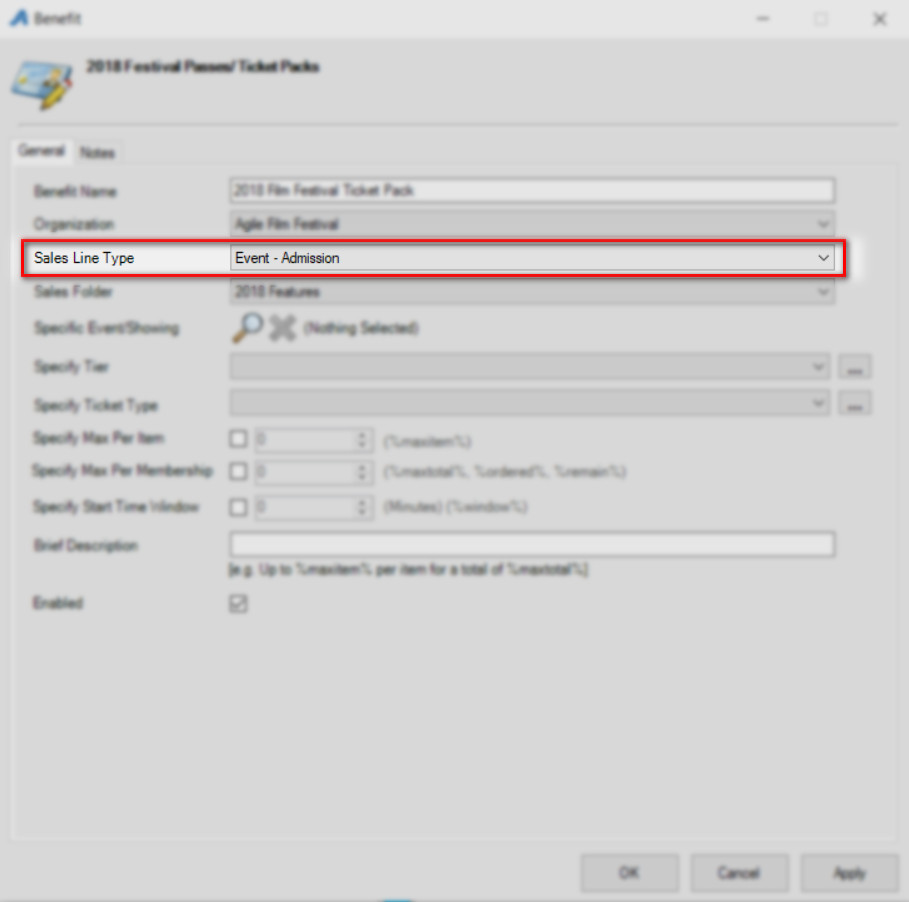
35. Select the correct Sales Line Type. NOTE: You MUST make sure that this matches the Sales Line Type of your Events. If you have multiple Events with different Sales Line Types, you will need to create a Benefit for each Sales Line Type.
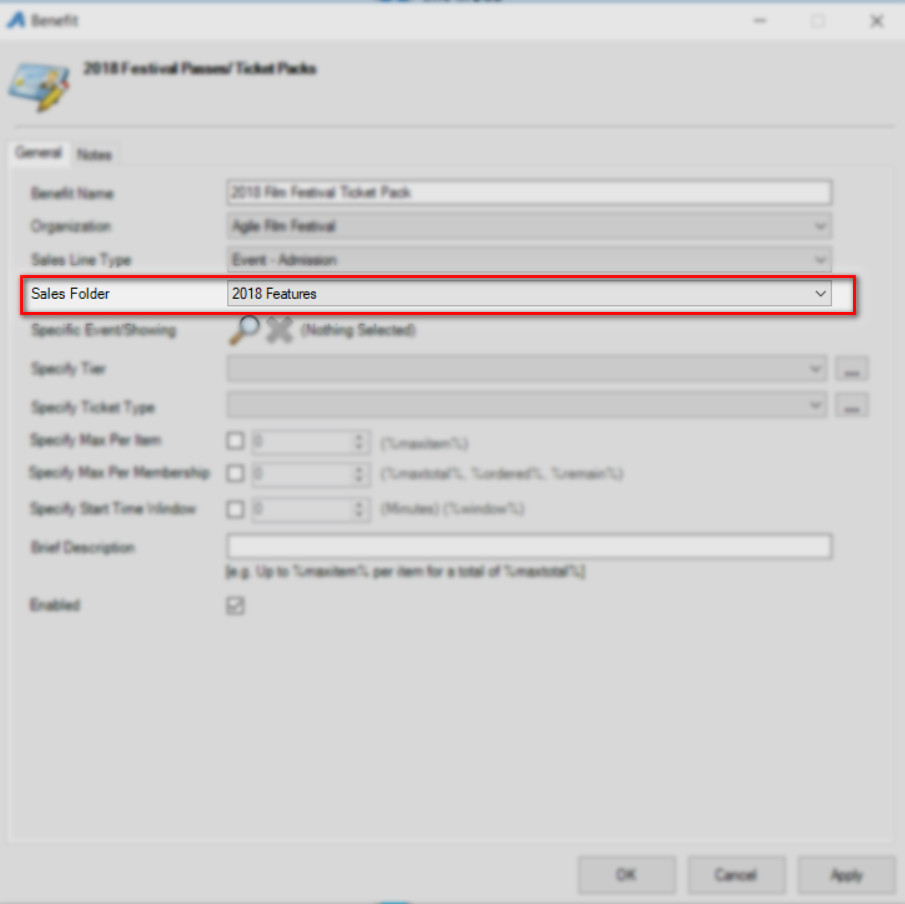
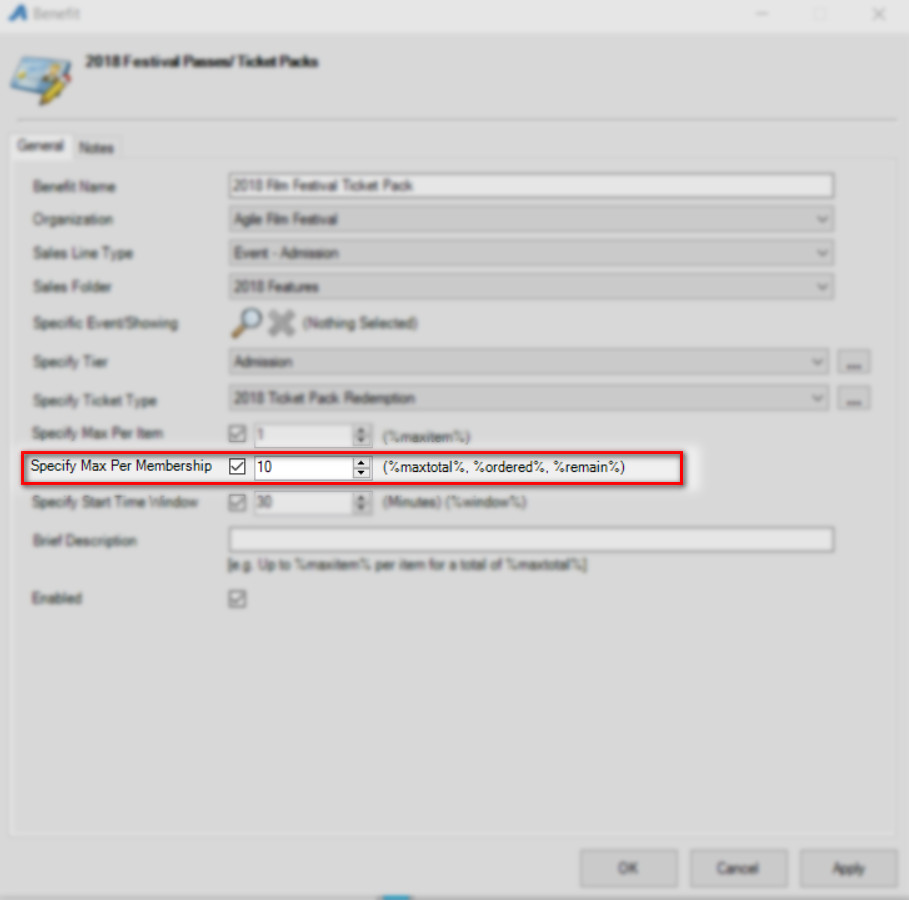
36. Select the Sales Folder that has all of your shows that this benefit will be available.
37. If this is a benefit for a specific Event/Showing, then select that event. If not, skip this step.
38. Select the Tier. 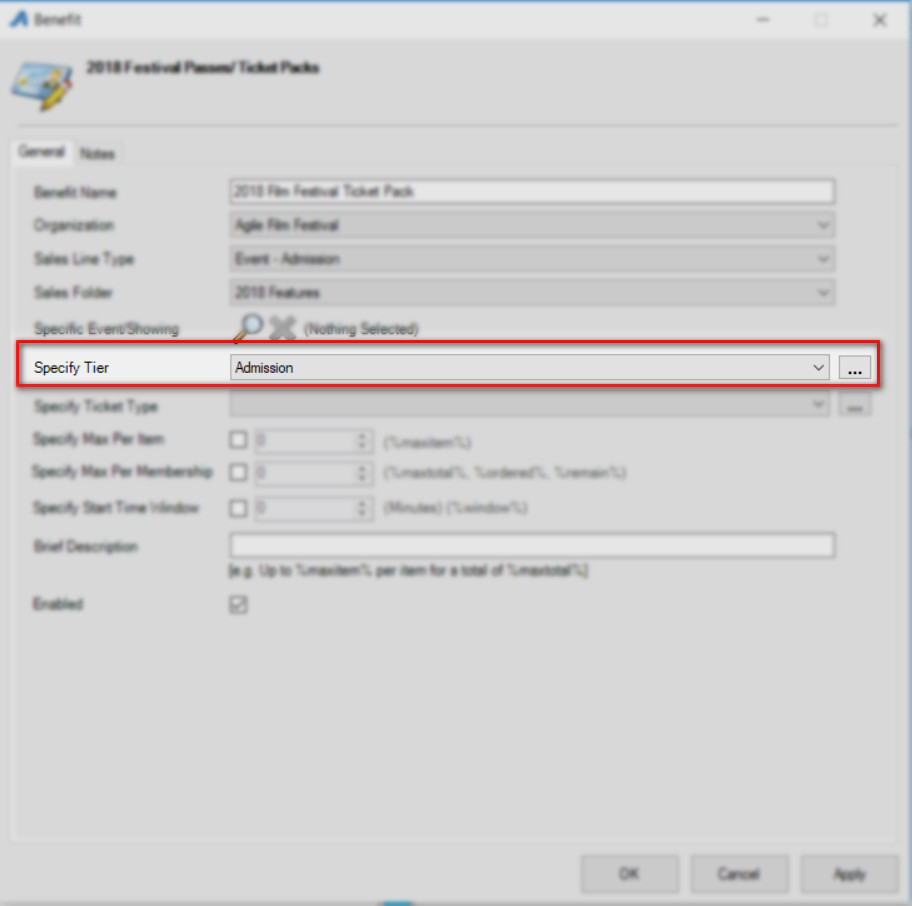
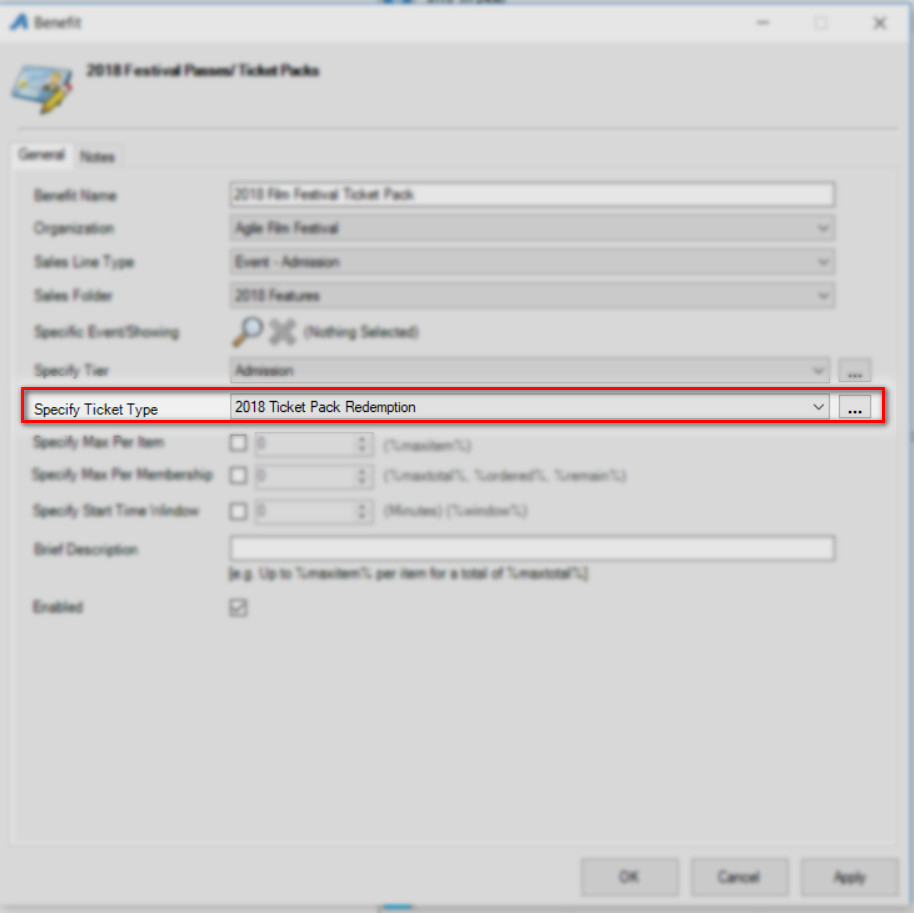
39. Select the Specific Ticket Type from the drop-down. If you haven't built your shows, but want to assign a ticket type to the benefit, click on the Ellipsis button and create the name of the redemption ticket (i.e. 2018 Ticket Pack Redemption).
40. If you want to restrict how many redemption tickets per item/event a customer can receive, checkmark Specify Max Per Item and enter how many tickets per item/event a customer will be able to redeem.
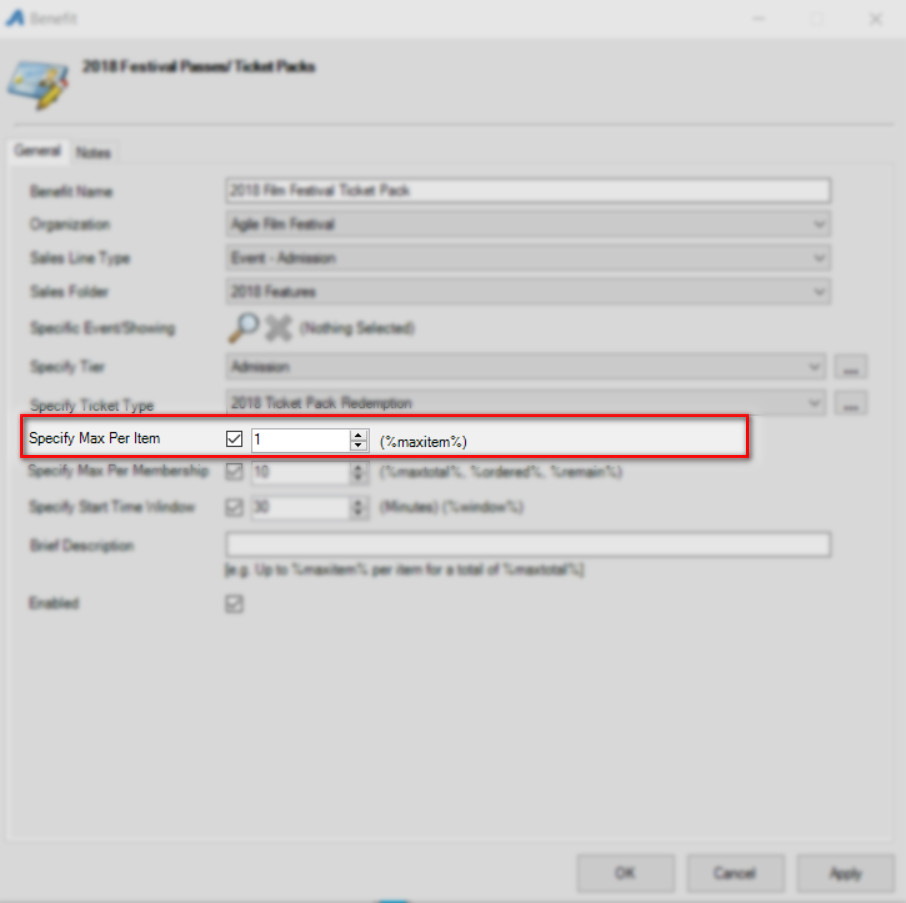
41. Make sure to enter the max number of tickets that are available for each pack by entering the amount in Specify Max Per Members area (i.e. if you have a 6-pack, then you will want to limit the number of tickets per member at 6).
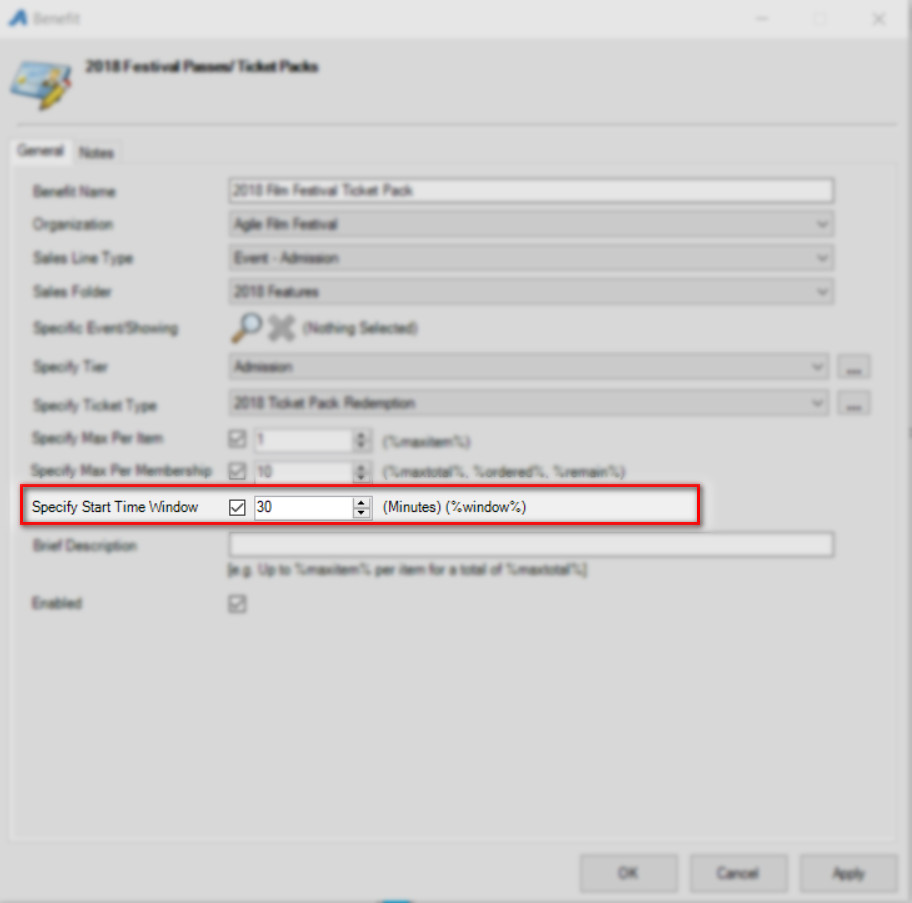
42. If your benefits restrict the number of showings that they can attend within a specific time period, enter the number of minutes in the Specify Start Time Window.
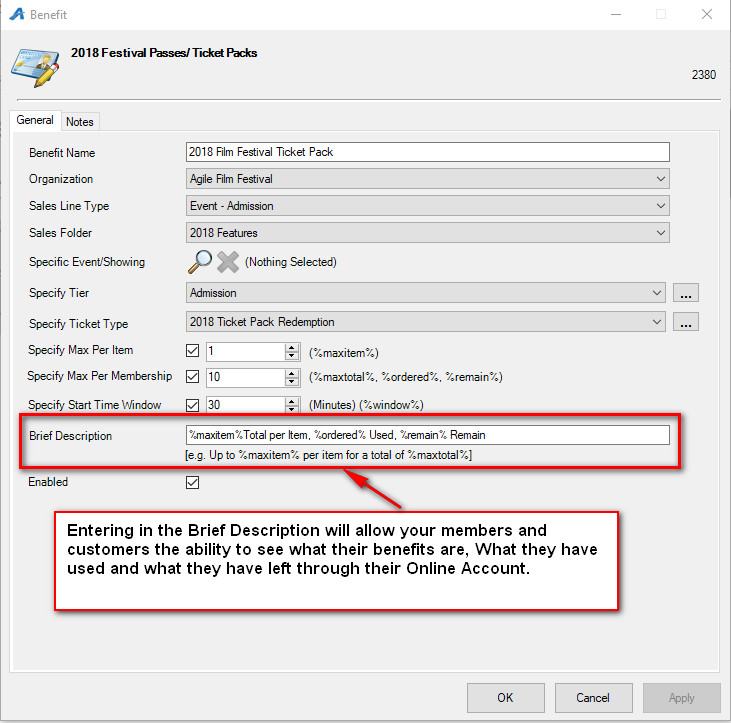
43. For organizations that would like their customers to have access to their benefits online enter in the following information in the Brief Description so that the information appears in their account area online:
Total %maxitem% will show the total number of items allowed with this benefit.
Used %ordered% will show the total number of benefits that have already been used.
Remain %remain% will show the total number of benefits that they have left to use.
IMPORTANT NOTES:
You should always test selling a Ticket Pack as well as test redeeming the benefits prior to going on sale to the general public. You should always do this in AMS as well as through Web Sales Channels.
You MUST collect customer name and email address when selling these ticket packs as the benefits are attached to their customer record and will only be able to access the benefits through their email address when online.
Comments